
Create One-Time Invoice
A one-time invoice is one you build by hand for a job that is not on a recurring schedule. This shows you how to create one in CleanGuru, add what you are charging for, put tax on it and send it out.
Start the Invoice
Click New Invoice
Click Invoices in the top menu, go to the Invoices link and click the green New Invoice button.
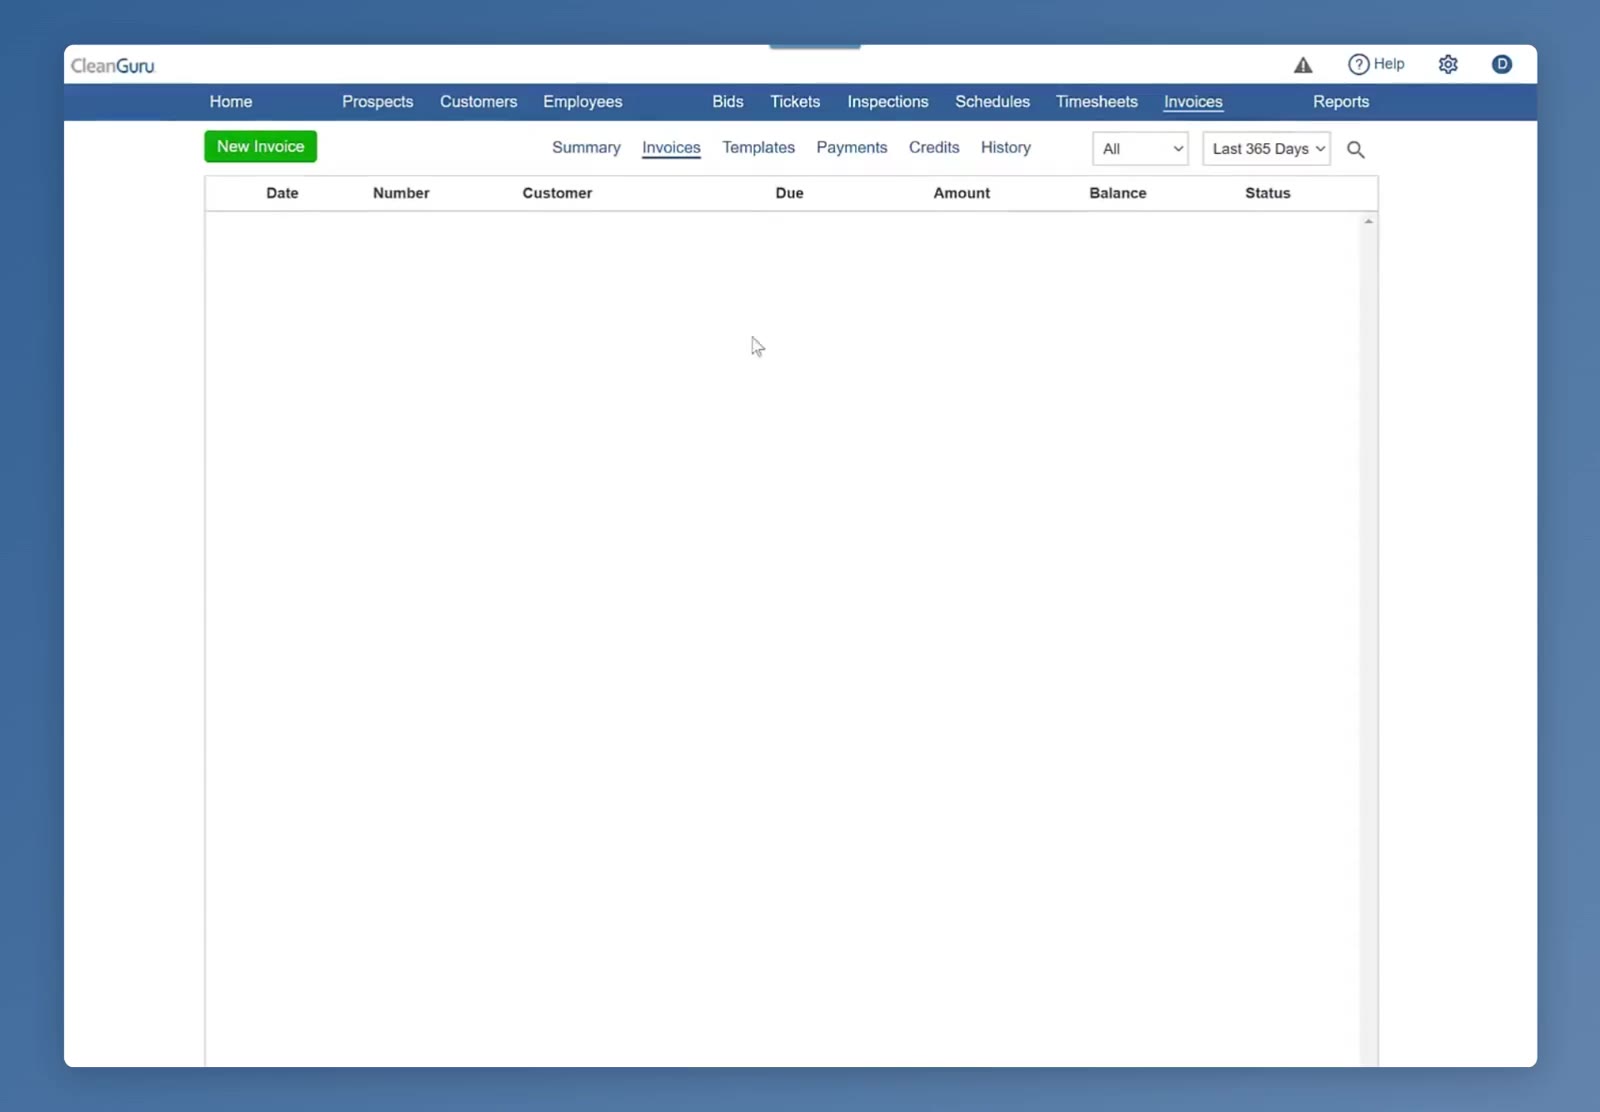
New Invoice sits above the invoice list on the Invoices tab.
Pick the customer
The Create Invoice box asks for a Customer and a Source. Choose the customer you are billing.
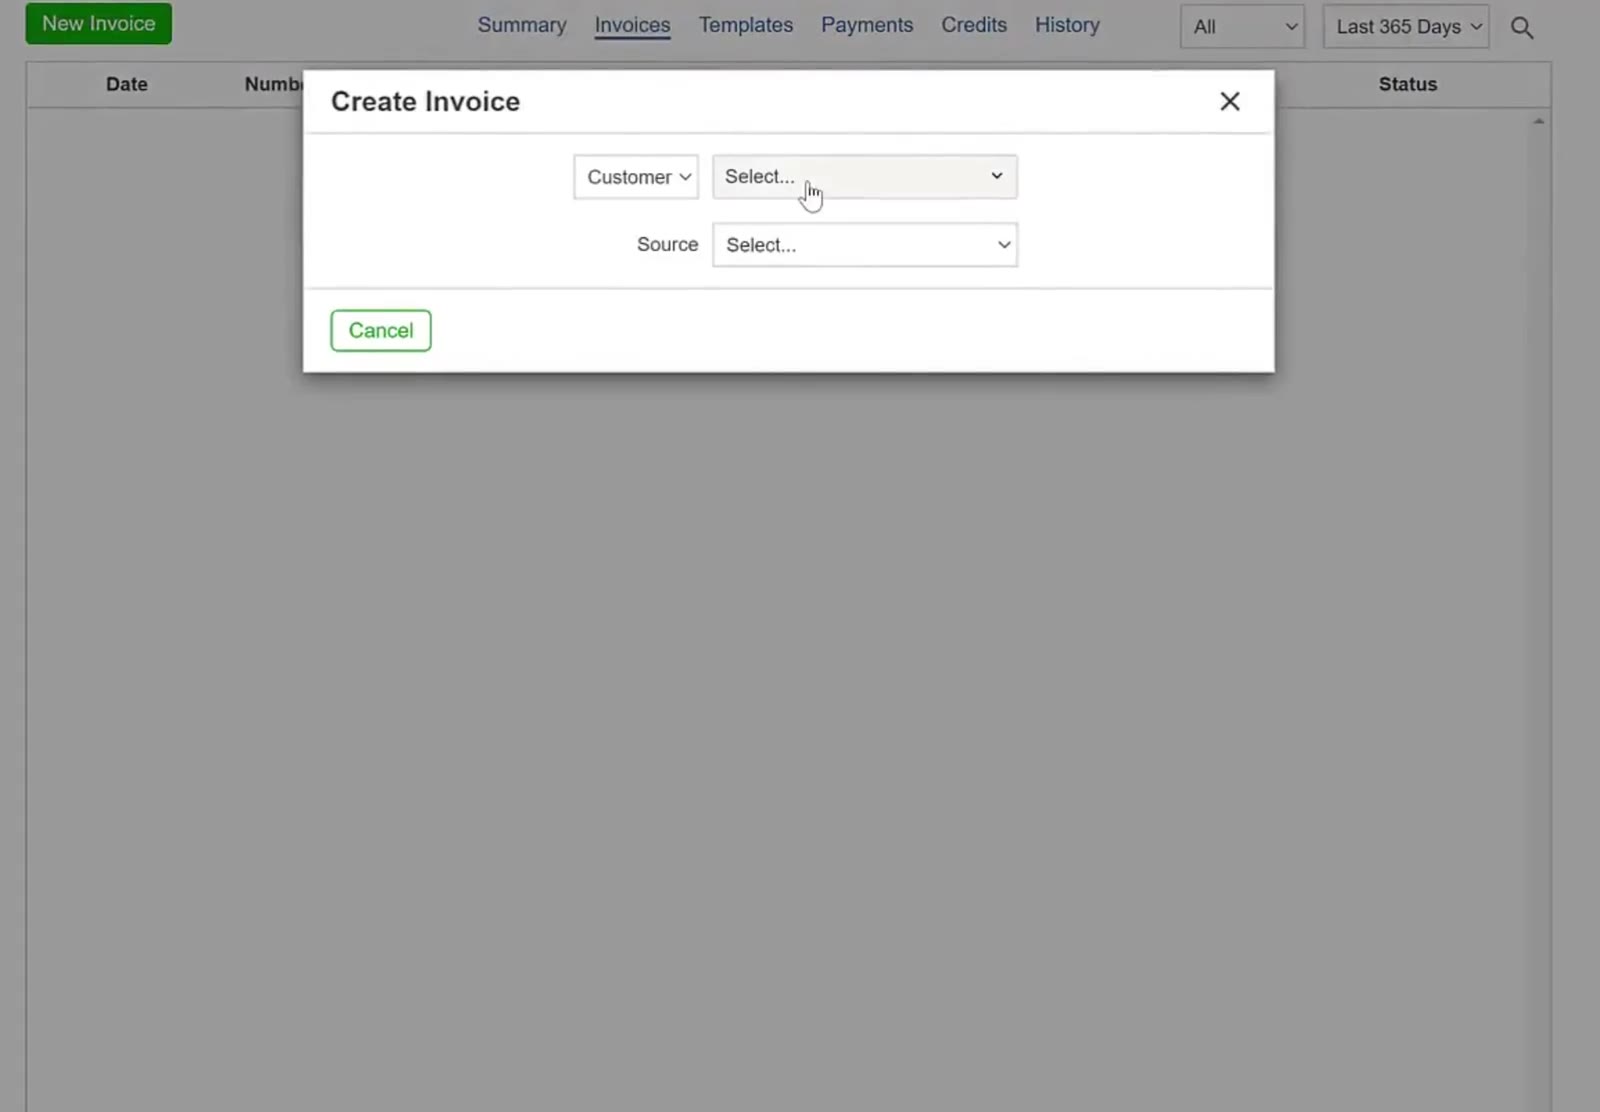
The Create Invoice box takes a Customer and a Source.
Check the top of the invoice
The invoice opens with a Draft badge. CleanGuru fills in the Invoice #, Date, Due date and Terms, and the Bill To block and email address come from the customer record. Changing Terms moves the Due date to match.
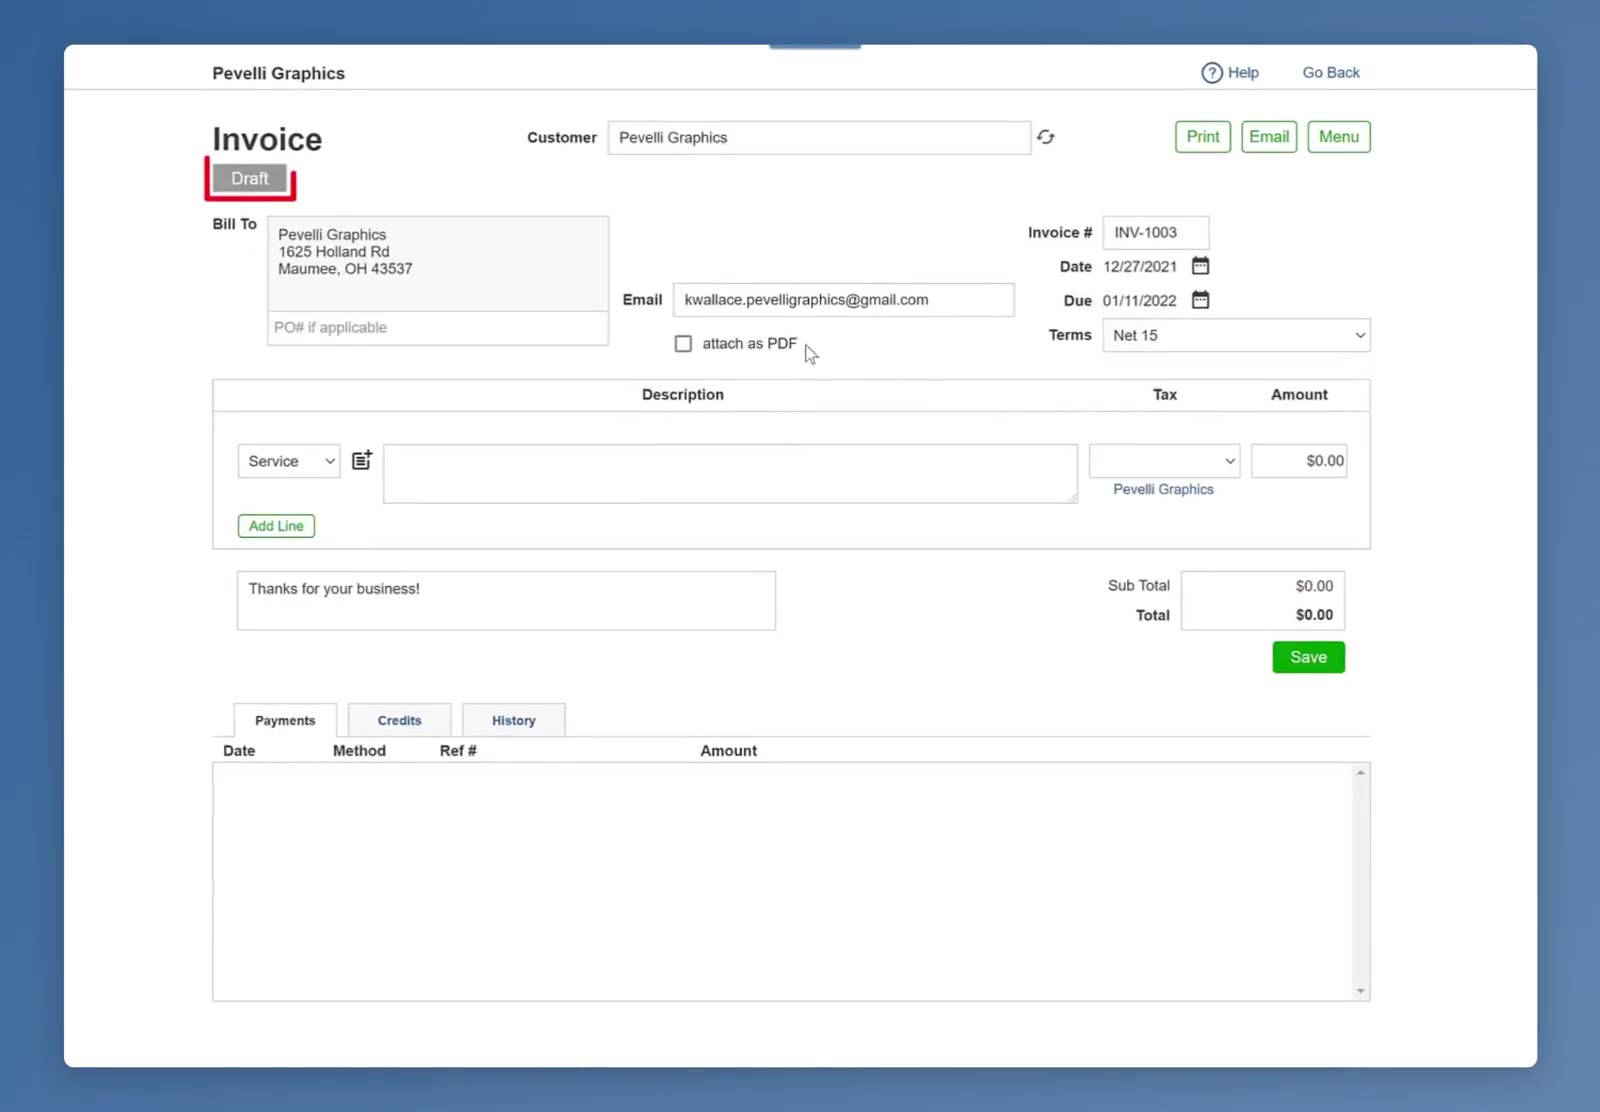
A new invoice starts as a Draft, with the customer's details already filled in.
Add What You Are Charging For
Describe the work
On the first line, type what you did in the Description box — or click the small notepad icon just to its left and pick from CleanGuru's ready-made wording instead of typing.
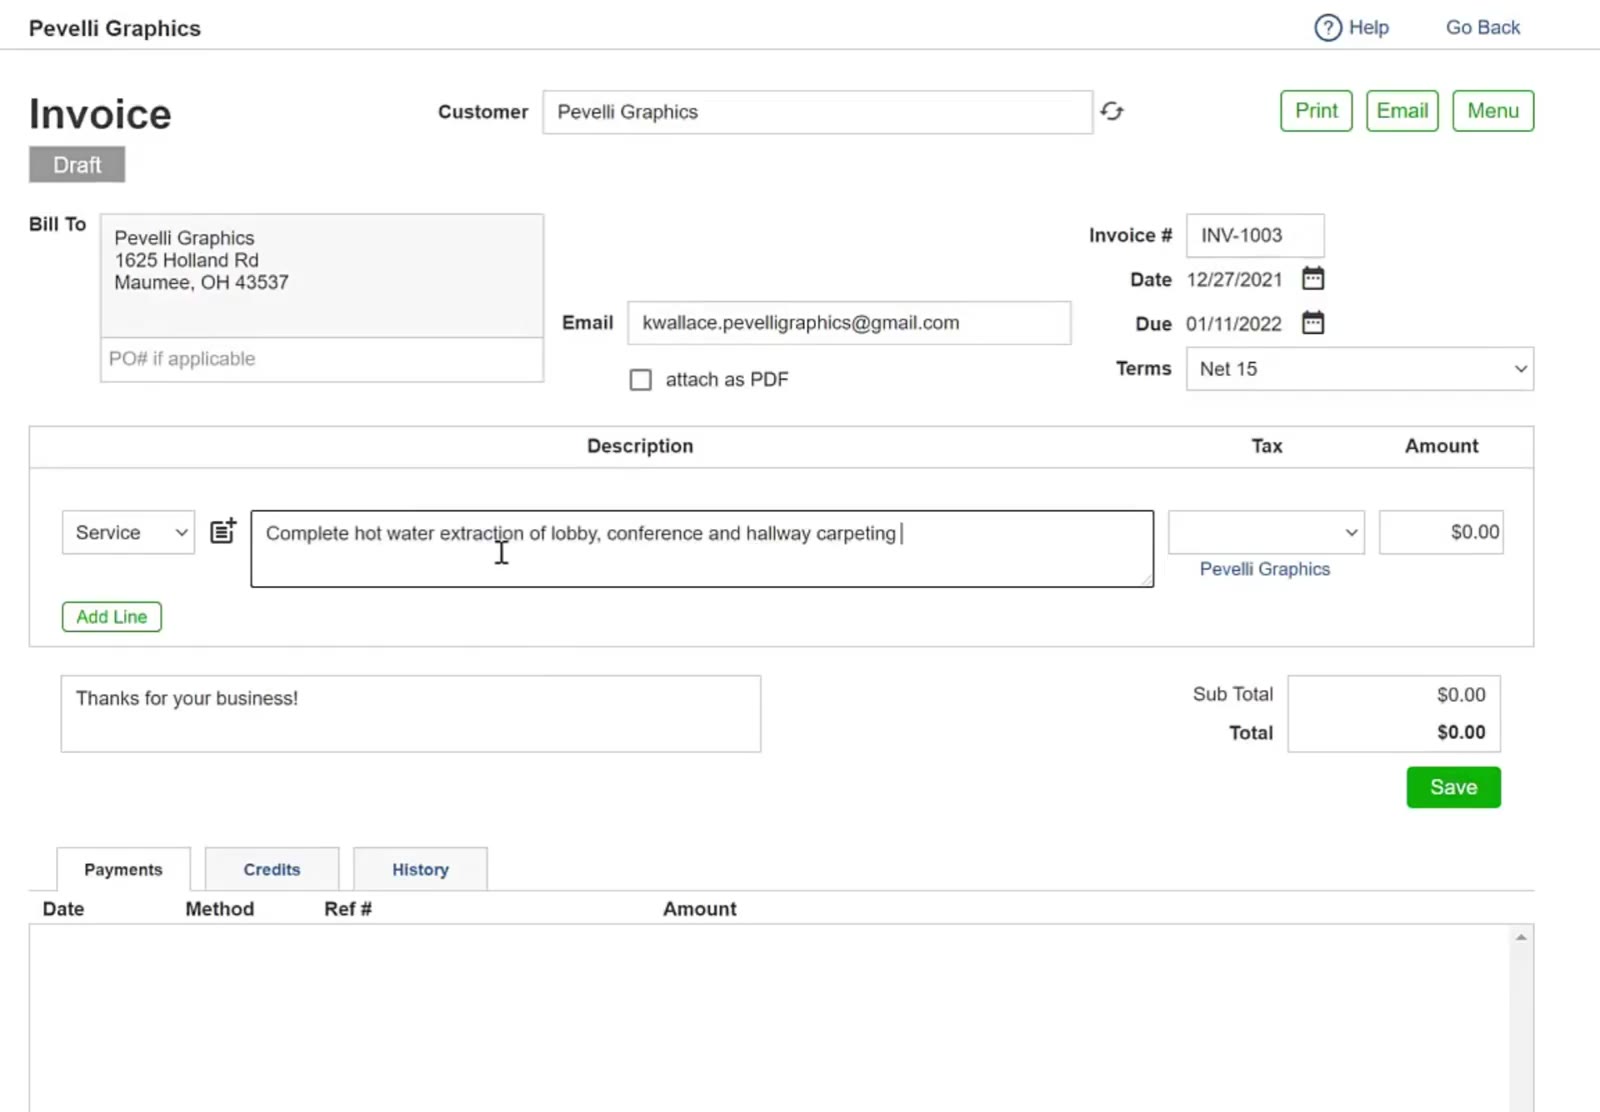
The notepad icon beside the Description box opens the ready-made wording; the box itself takes whatever your customer will read.
Add more lines
Click Add Line for another row. Each row has a type dropdown: a Product row asks for Qty., Unit and Rate; an Hourly row asks for Hrs. and Rate. The red X at the end of a row removes it.
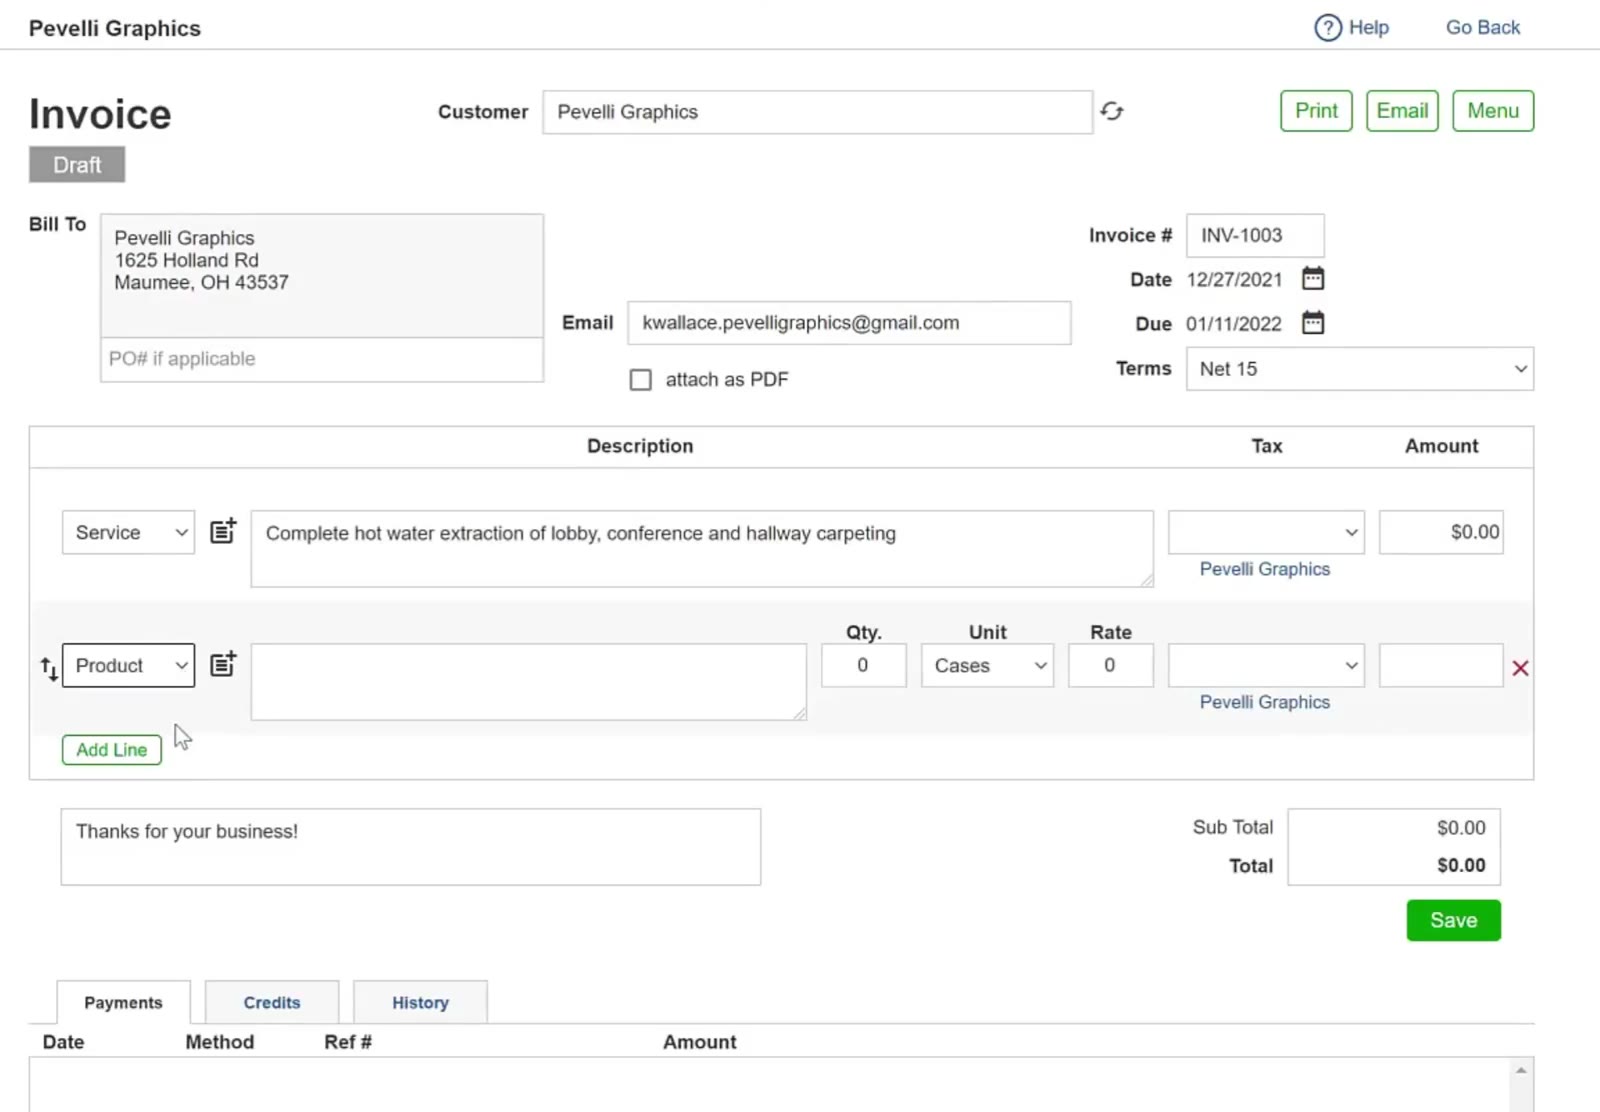
A Product row swaps in Qty., Unit and Rate columns, with a red X to remove the row.
Put in the amount and the tax
Type the Amount for the line. If it is taxable, pick a rate in the Tax column — CleanGuru adds the tax as its own line and works out the new total.
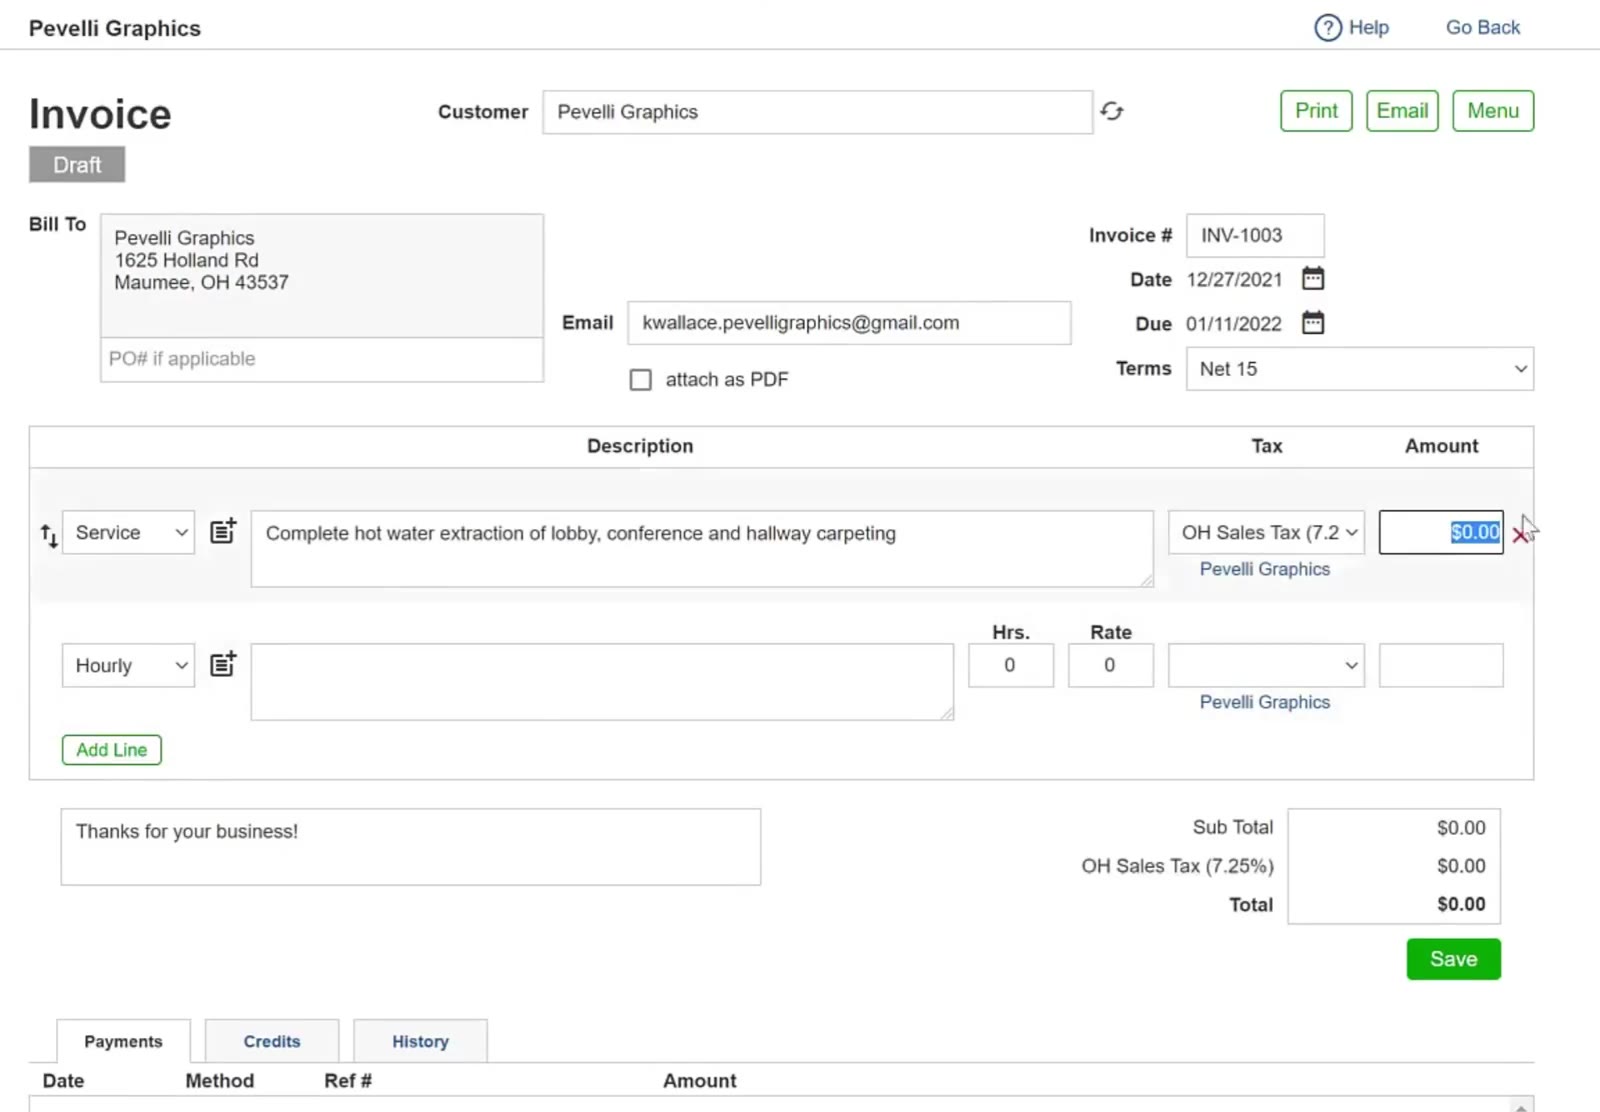
Picking a rate in the Tax column adds a tax line under the sub total.
Save it
Check the Sub Total, the tax line and the Total, then click the green Save.
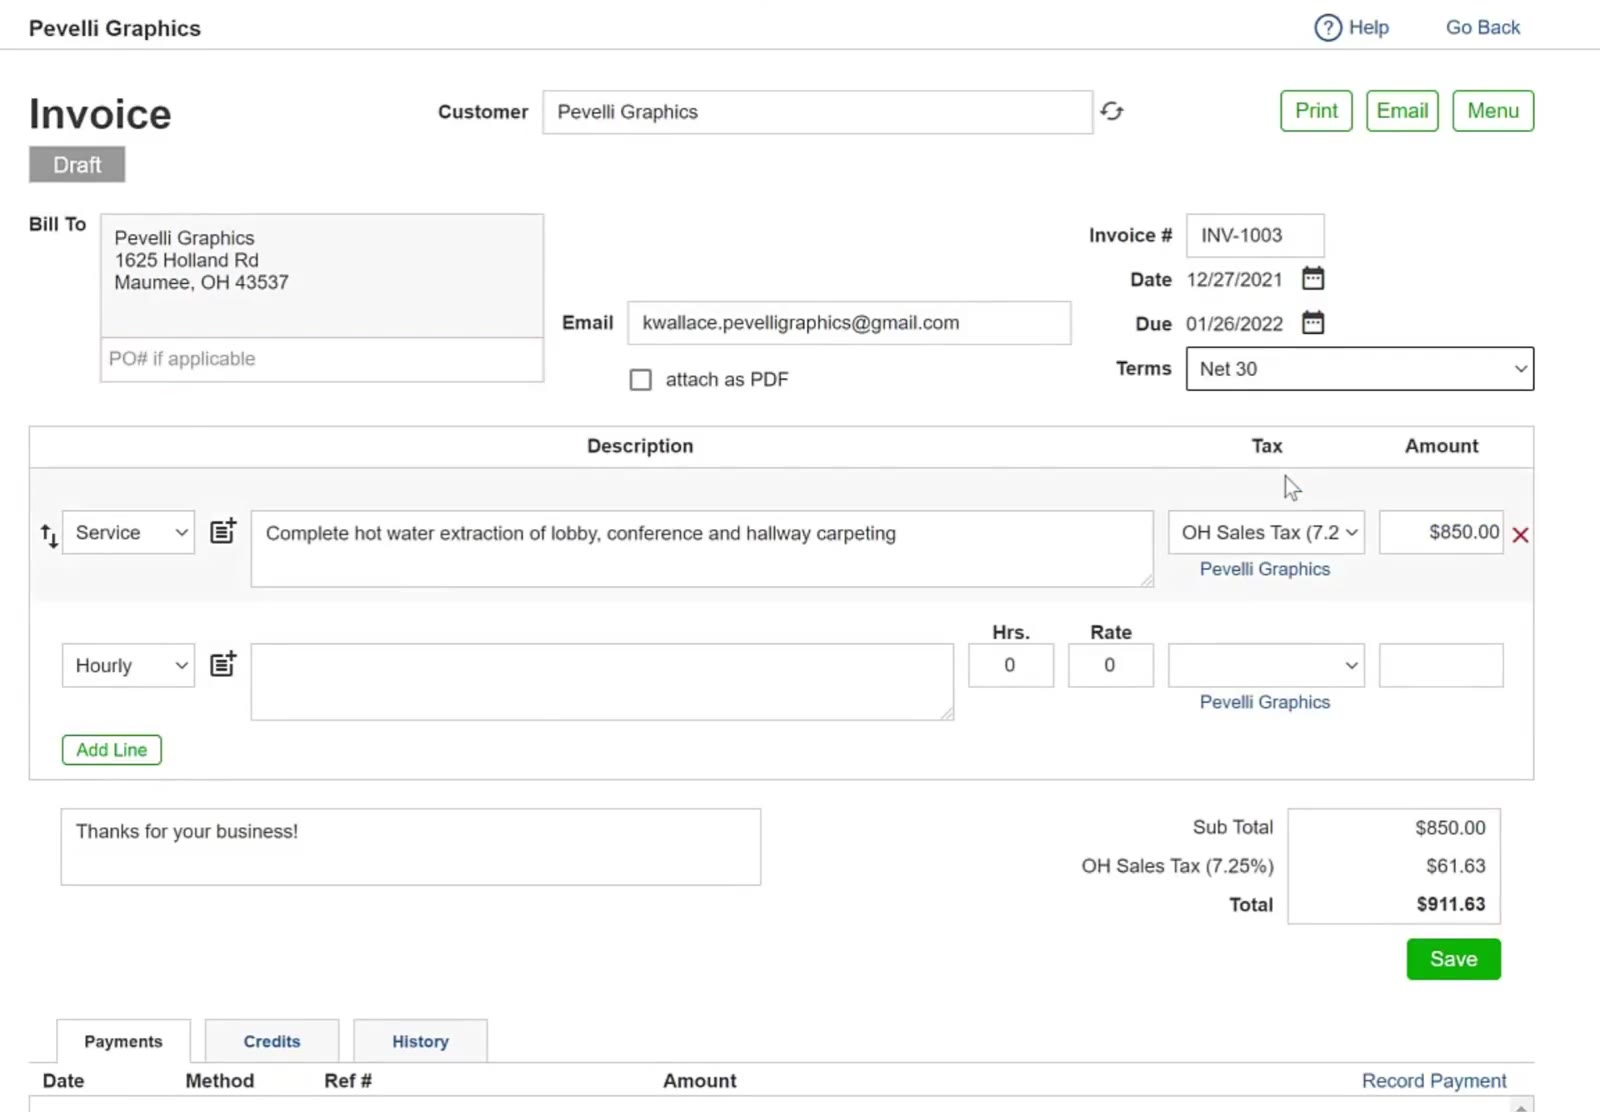
The sub total, the tax and the total sit above the Save button.
Send It
Print or email it
The Print and Email buttons sit at the top right of the invoice. Emailing it from here takes the invoice out of Draft.
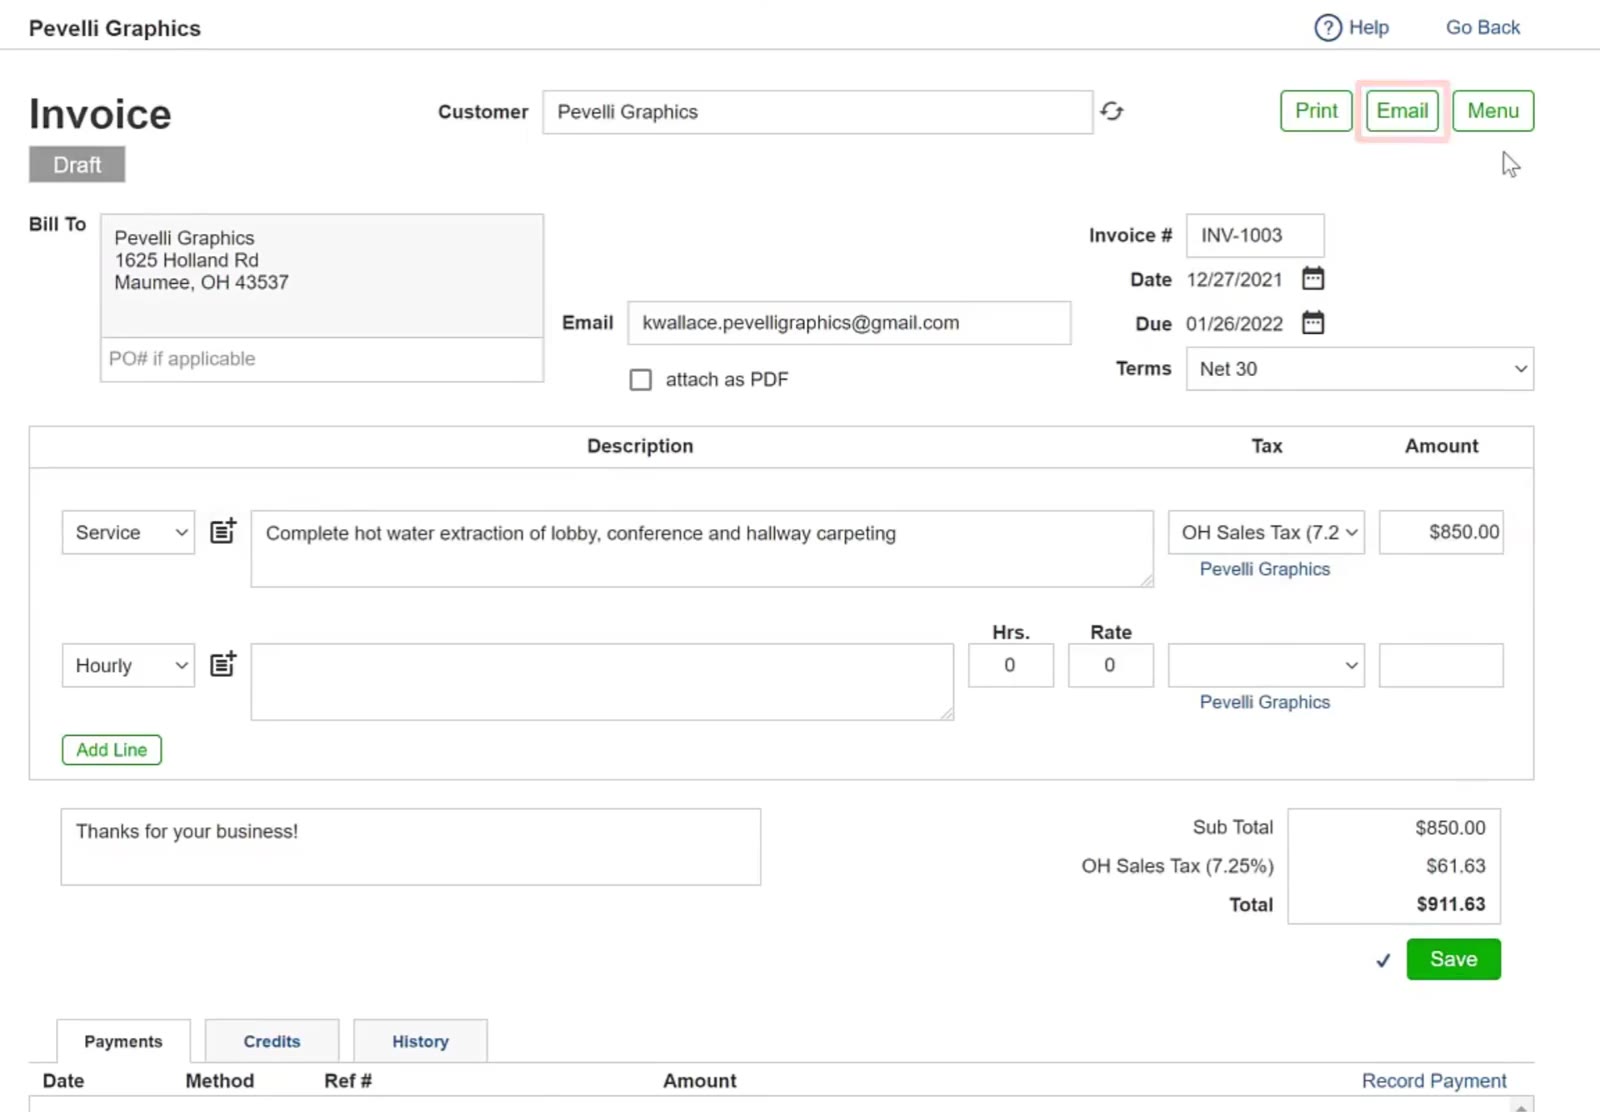
Print and Email sit beside Menu at the top right.
Mark it as sent
If you send the invoice some other way — printing and mailing it, say — click Menu and choose mark sent. CleanGuru asks Mark Sent? — click OK. The badge changes from Draft to Current.
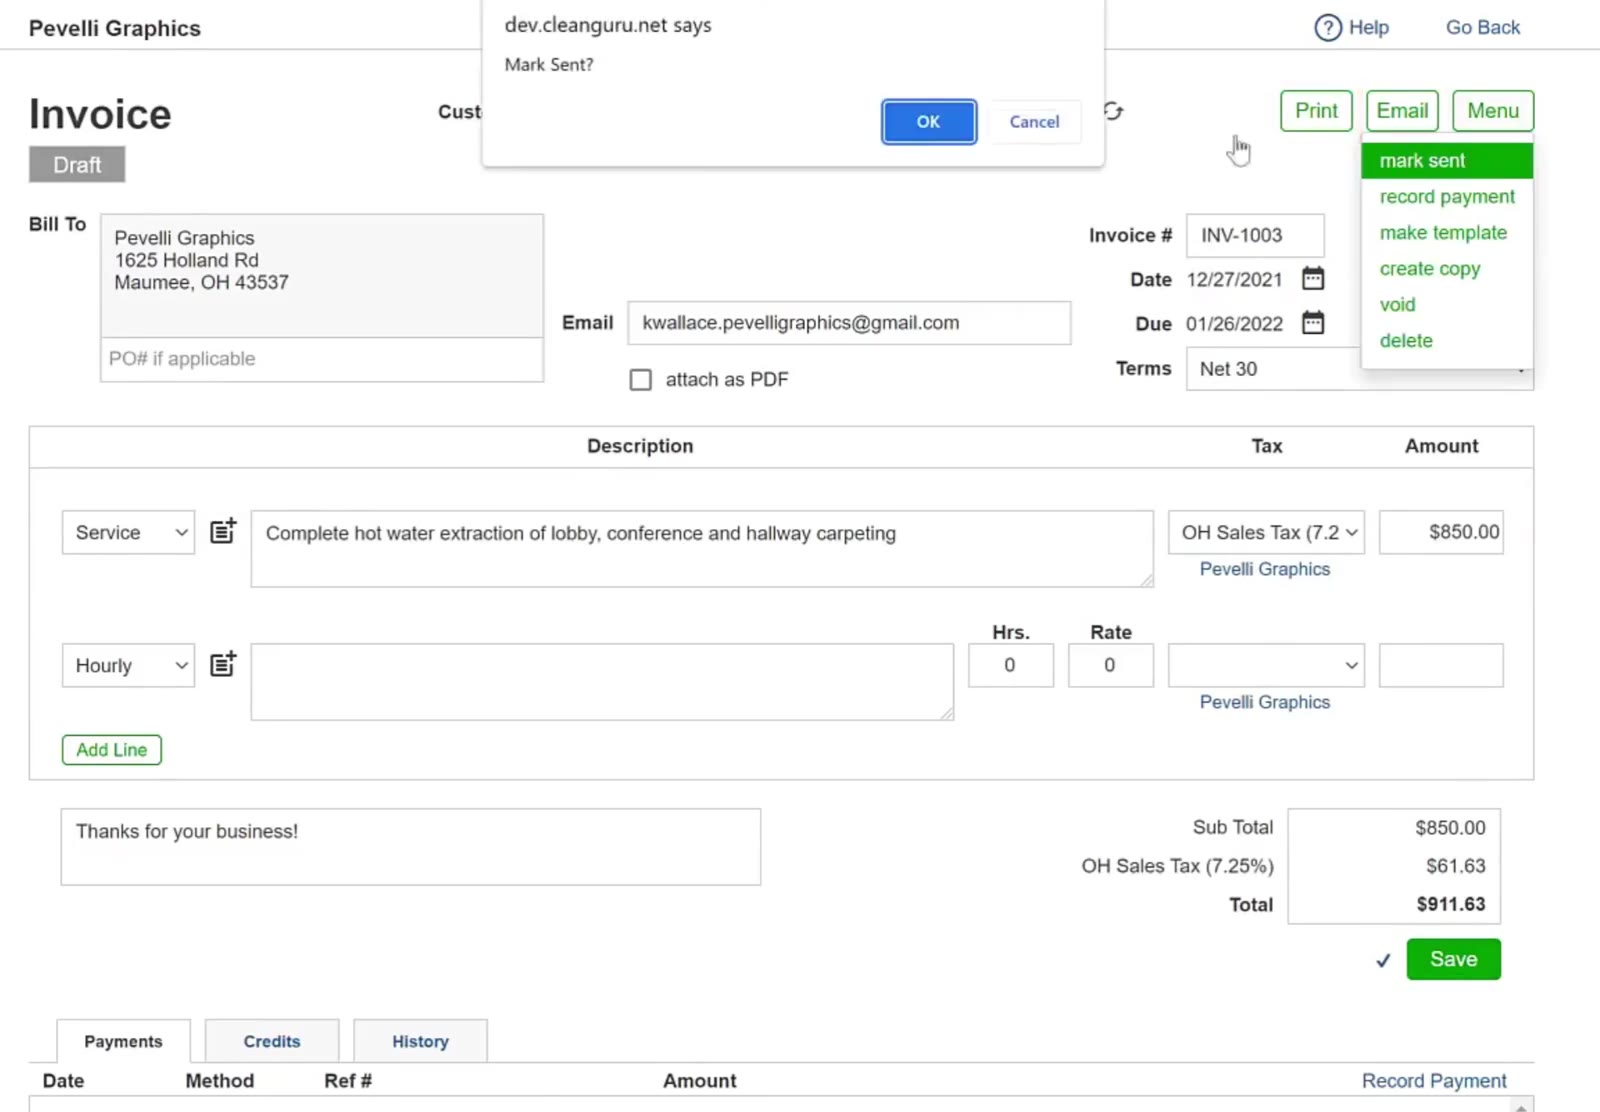
Choosing mark sent brings up a Mark Sent? confirmation.
FAQ
What does the Draft badge mean?
A new invoice starts as a Draft and stays one until you send it. Emailing it from the invoice does that; so does mark sent on the Menu, for an invoice you printed and mailed. Either way the badge changes to Current.
How do I bill for hours or for products instead of a flat service?
Change the type on that line. A Product row gives you Qty., Unit and Rate; an Hourly row gives you Hrs. and Rate.
How do I change when the invoice is due?
Change Terms. The Due date moves to match — going from Net 15 to Net 30 pushes it out another fifteen days.
How do I get rid of a line I do not need?
Click the red X at the end of that row.