
Quick Start: Inspecting
Inspections in CleanGuru start from a template. Build the template from a bid you have already done, put it on a schedule, and your supervisors carry out the inspection on their phone. This walks through the whole loop, from creating the template to reading the results.
Create the Template
Open the Templates list
Click Inspections in the top menu, then click the Templates tab underneath it.
Start a new template
Click the green New Template button.
Pick the customer and the source
In the Create Template box, choose who the template is for — the list is sorted by customer, with that customer’s buildings underneath each one. Then set Source. Bid brings across the areas from a bid you have already done, along with the things commonly checked in each of those areas. If you have not bid the building yet, pick Building Type instead.
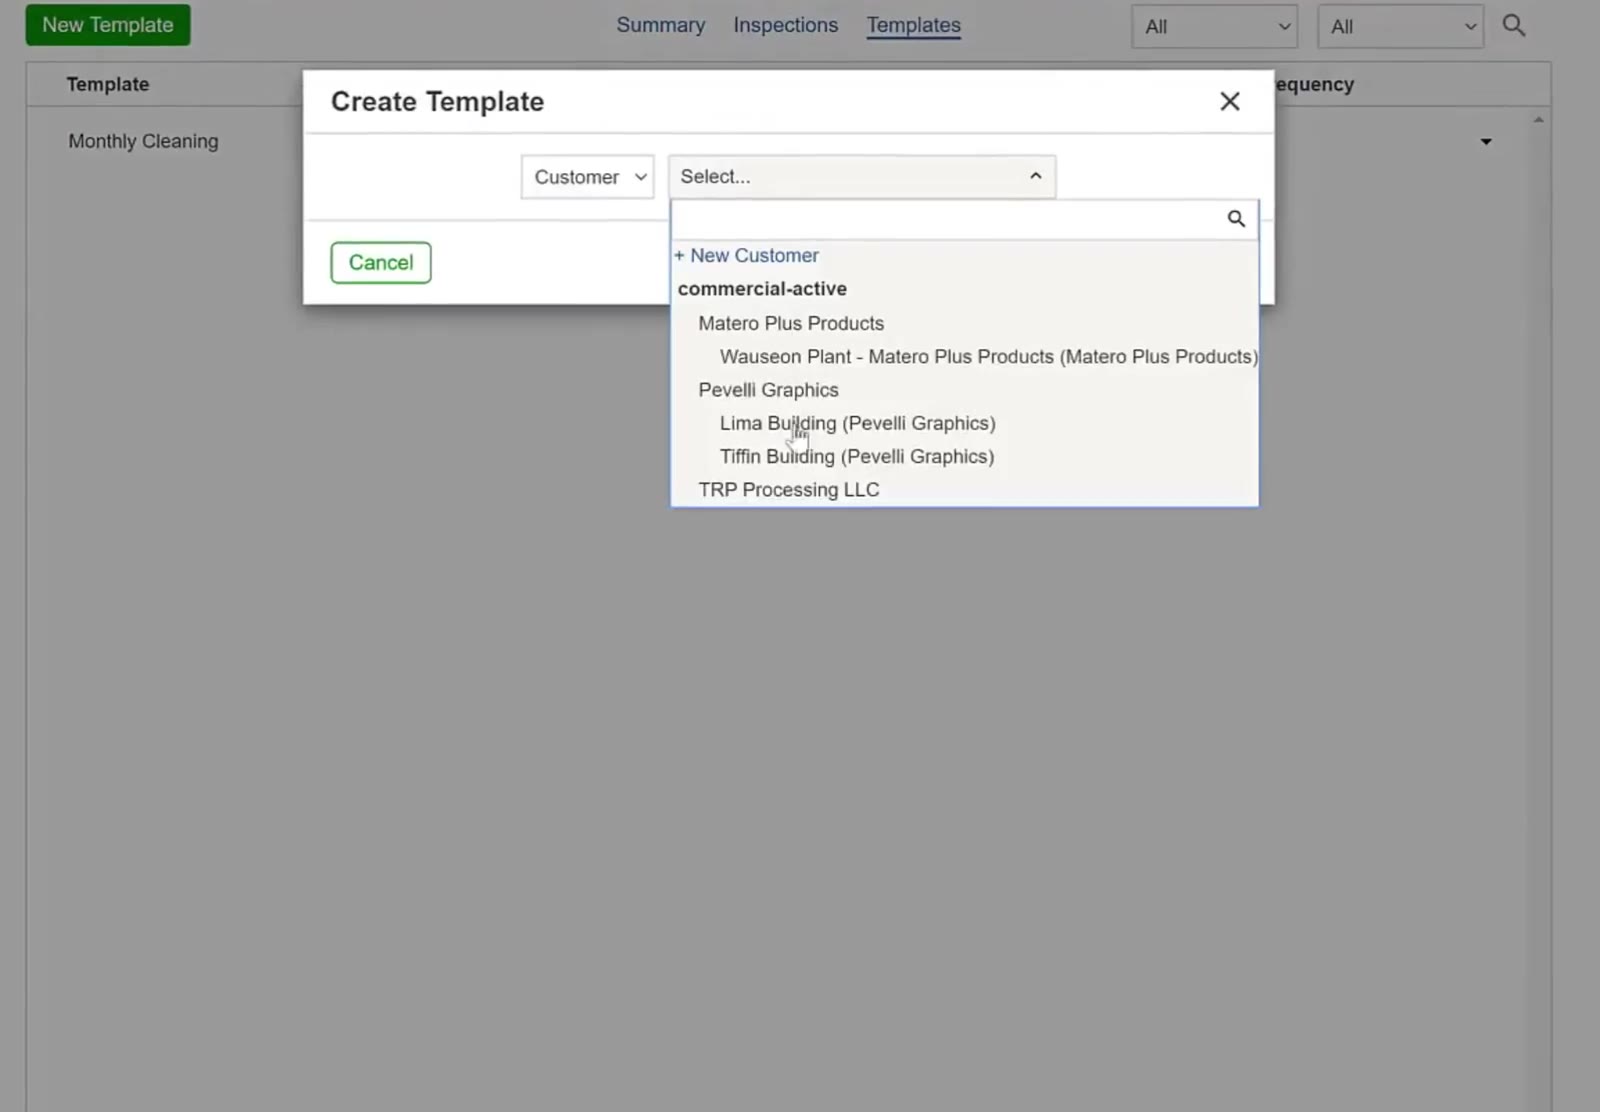
The Create Template box lists customers, with each customer’s buildings underneath.
Name it and create it
Give the template a name you will recognize later, such as Monthly Inspection, Pevelli Tiffin, then click Create. CleanGuru opens the new template straight away.
Put It on a Schedule
Set it to Scheduled
Change the status from Unscheduled to Scheduled. The frequency, Start and End boxes appear beside it. Pick how often the inspection should happen — Yearly, Quarterly, Monthly, Weekly, Daily or Every… — and set the start date.
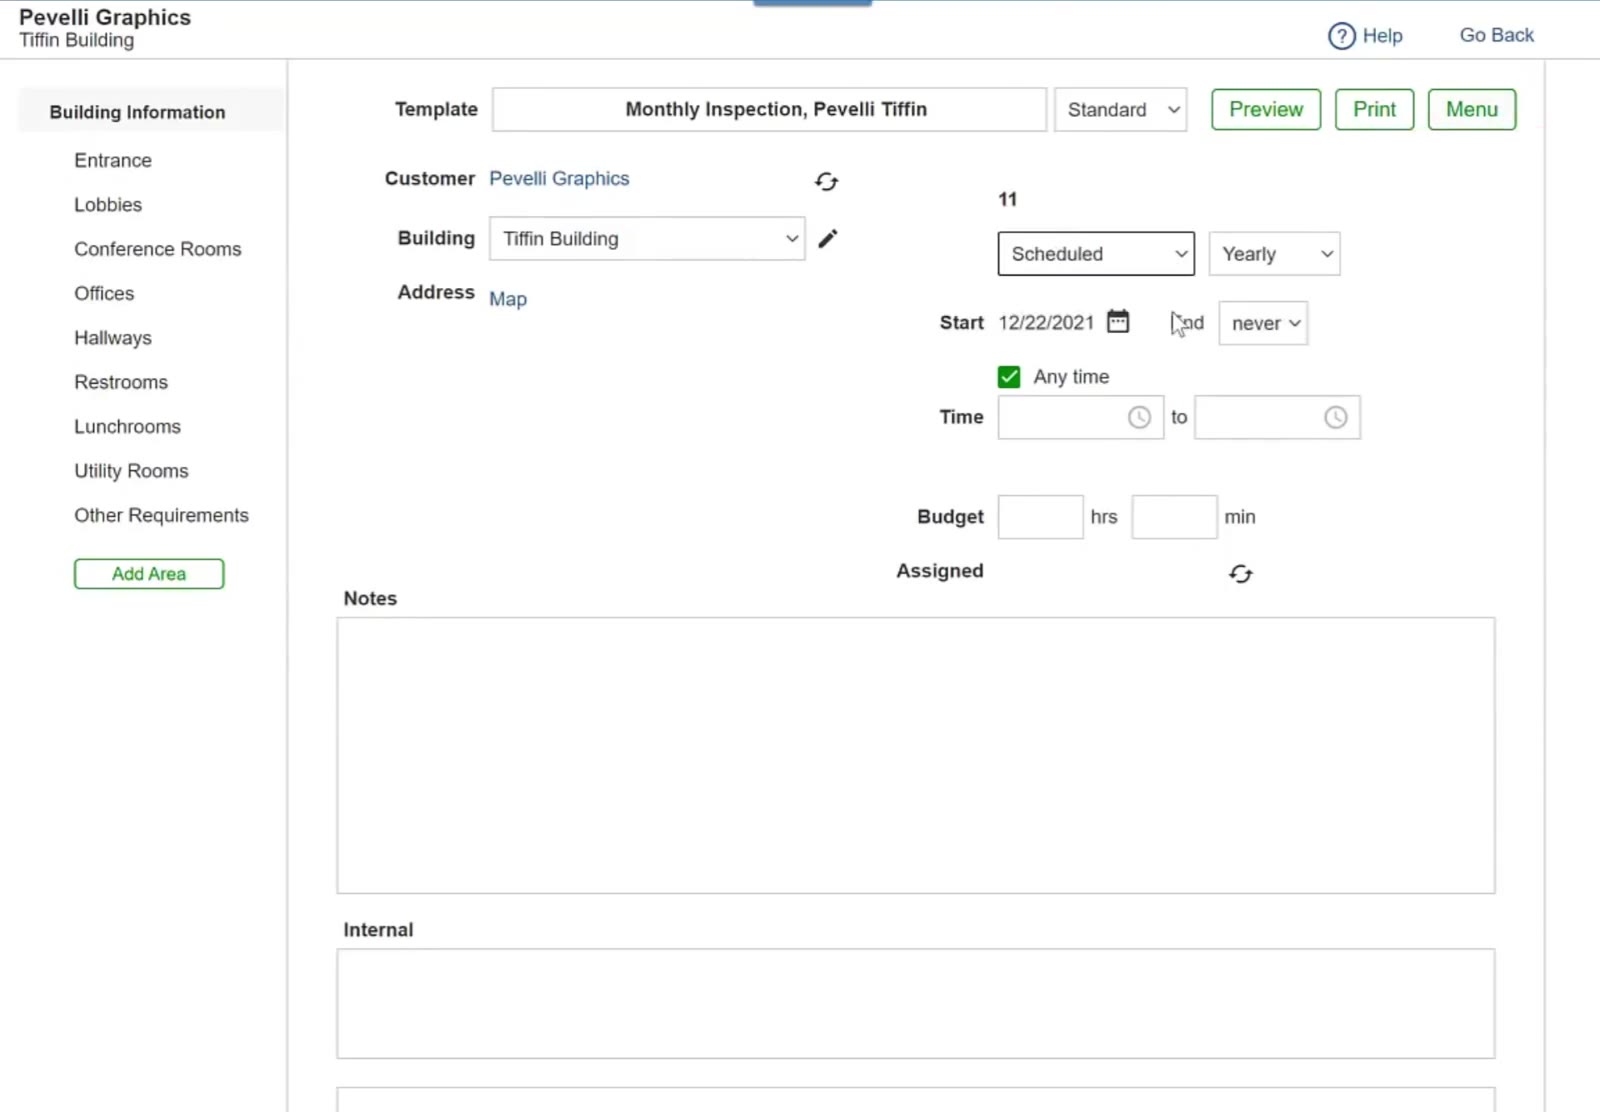
Setting the template to Scheduled reveals the frequency, Start and End boxes.
Save the template
Click Save. CleanGuru says Inspections Created! — click OK, and the inspection dates appear at the bottom of the page.
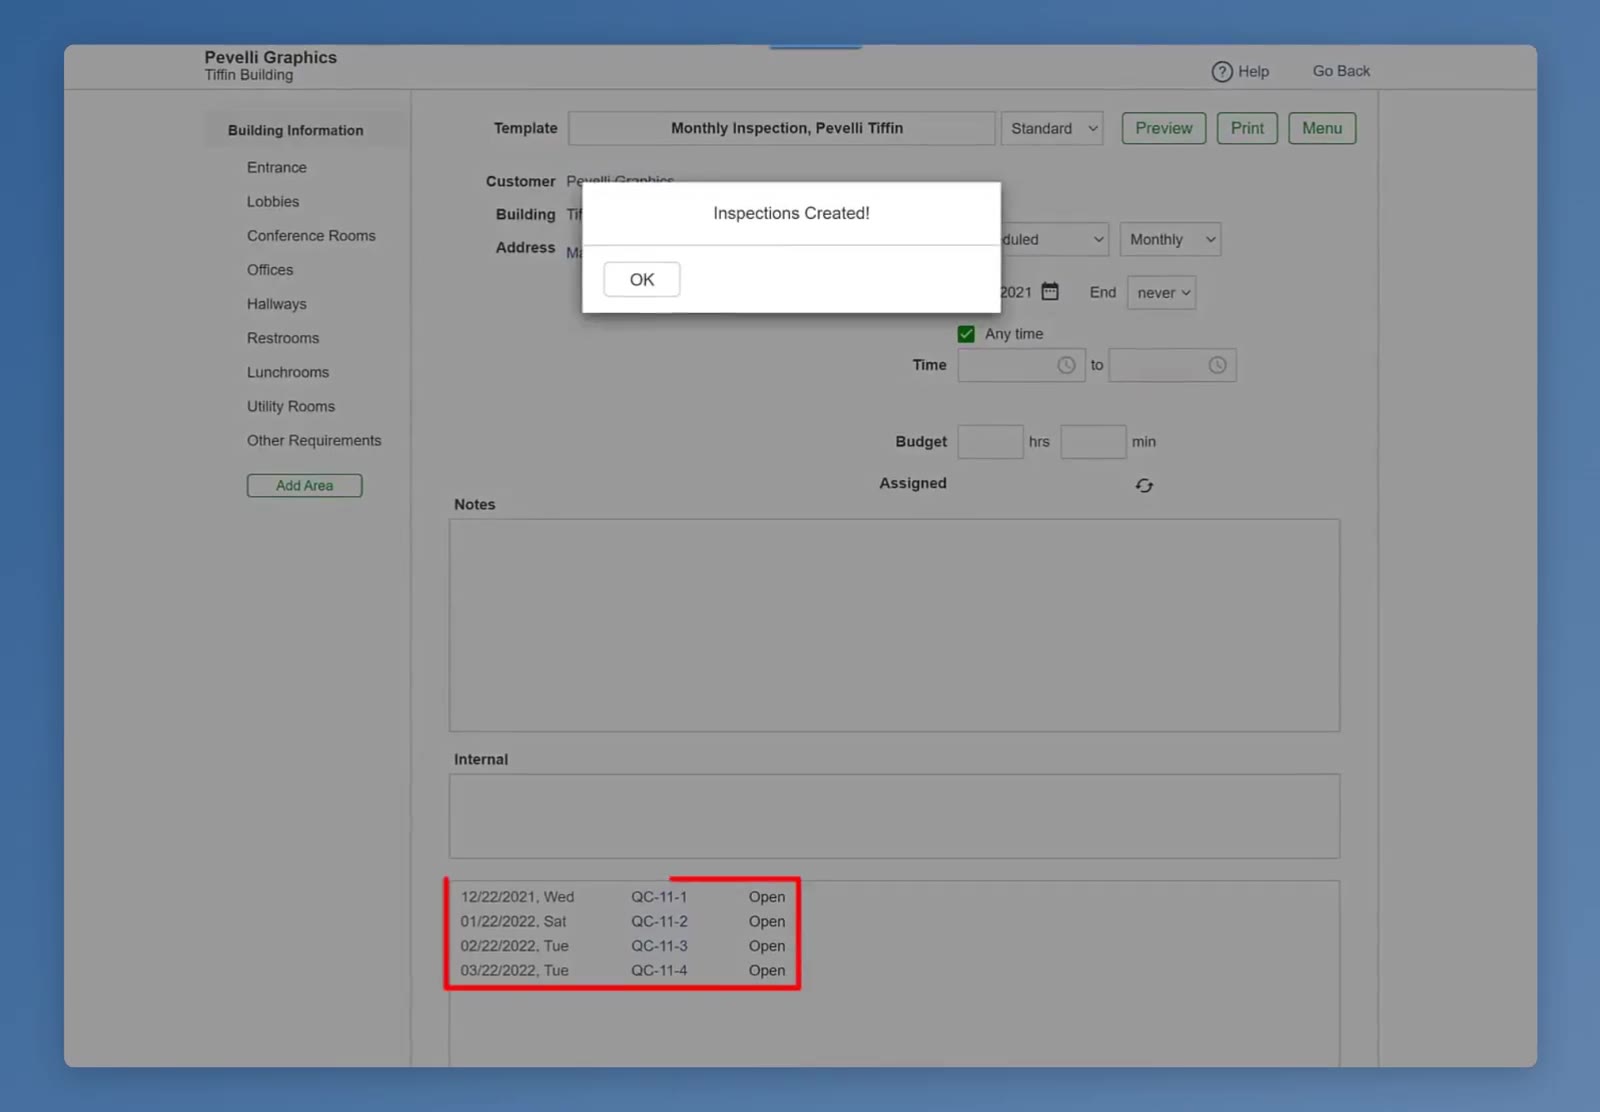
After you click Save, CleanGuru confirms with Inspections Created! and lists the dates at the bottom.
You do not have to put a template on a schedule. Leave it Unscheduled and it sits ready to use: an inspector out in the field can tap the inspection template in the mobile app and create an inspection on the spot.
Inspect on Site
Rate each item
Open the inspection in the CleanGuru mobile app and work through the areas. For each item — Glass, here — pick a rating: Very Good, Average, Poor or N/A. The pencil adds a comment and the camera adds a photo.
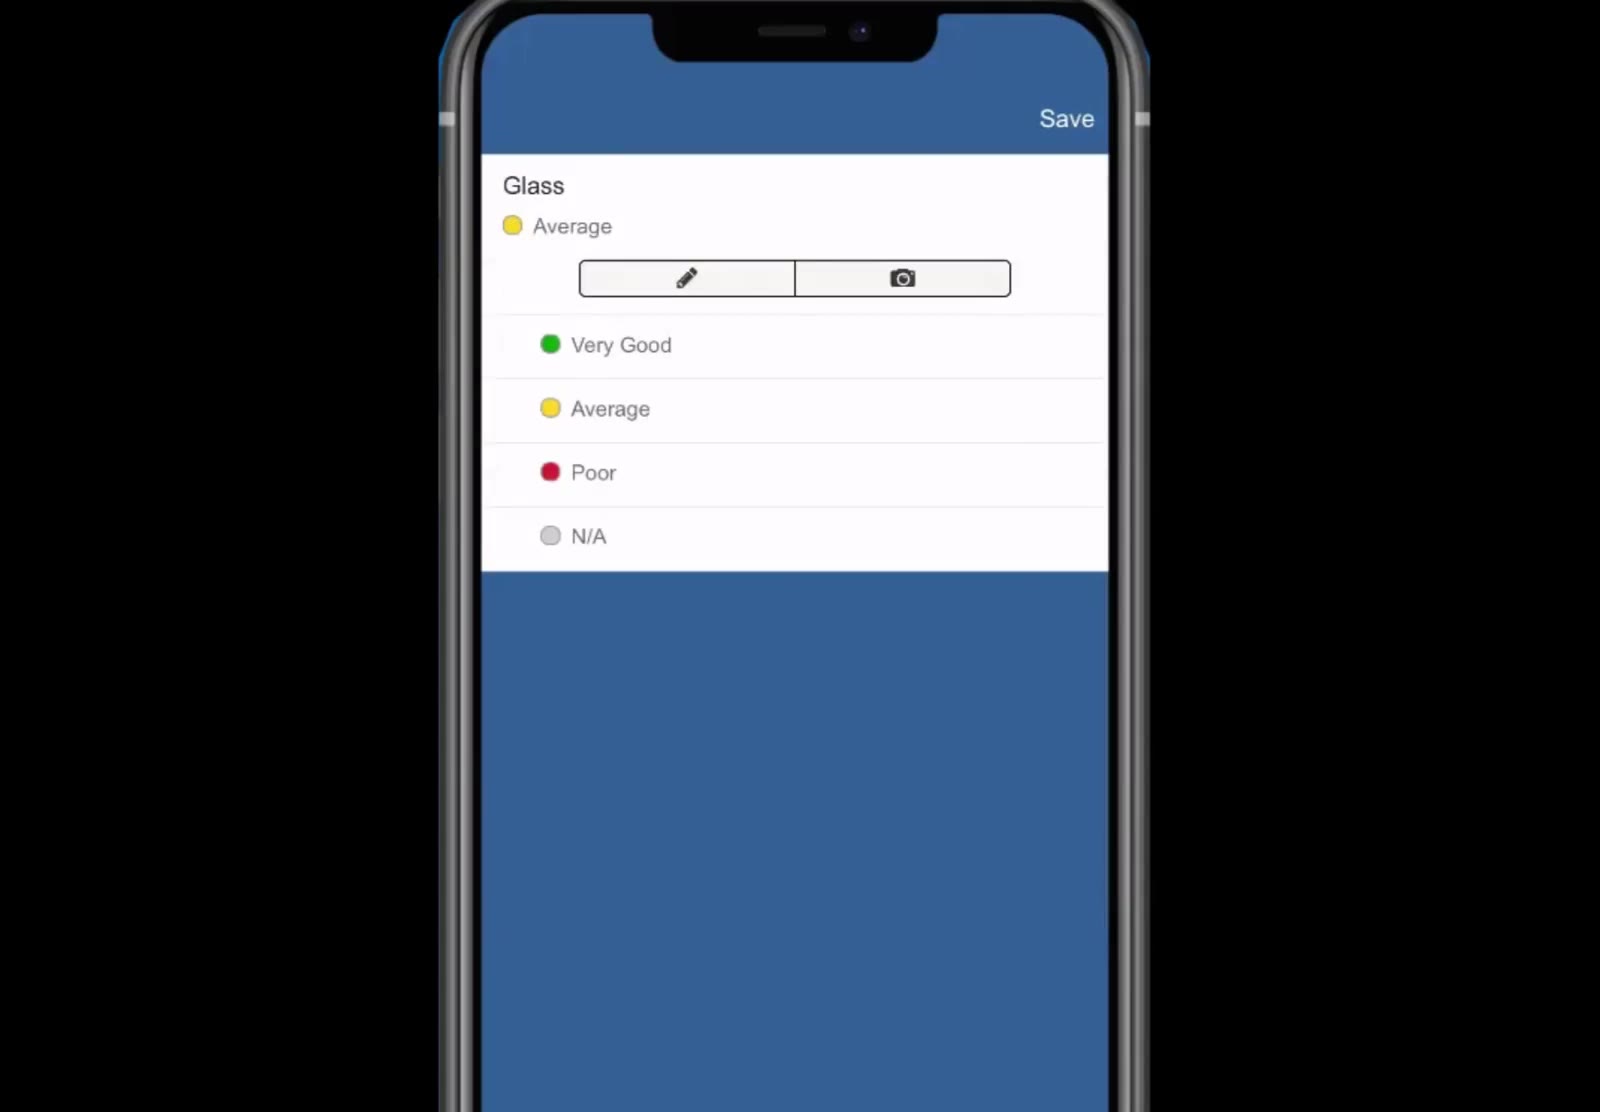
Each item is rated Very Good, Average, Poor or N/A, with a pencil for a comment and a camera for a photo.
Watch the scores
The Areas tab shows a score for each area as you work through it, and the figure in the top right is the average score for the whole building so far.
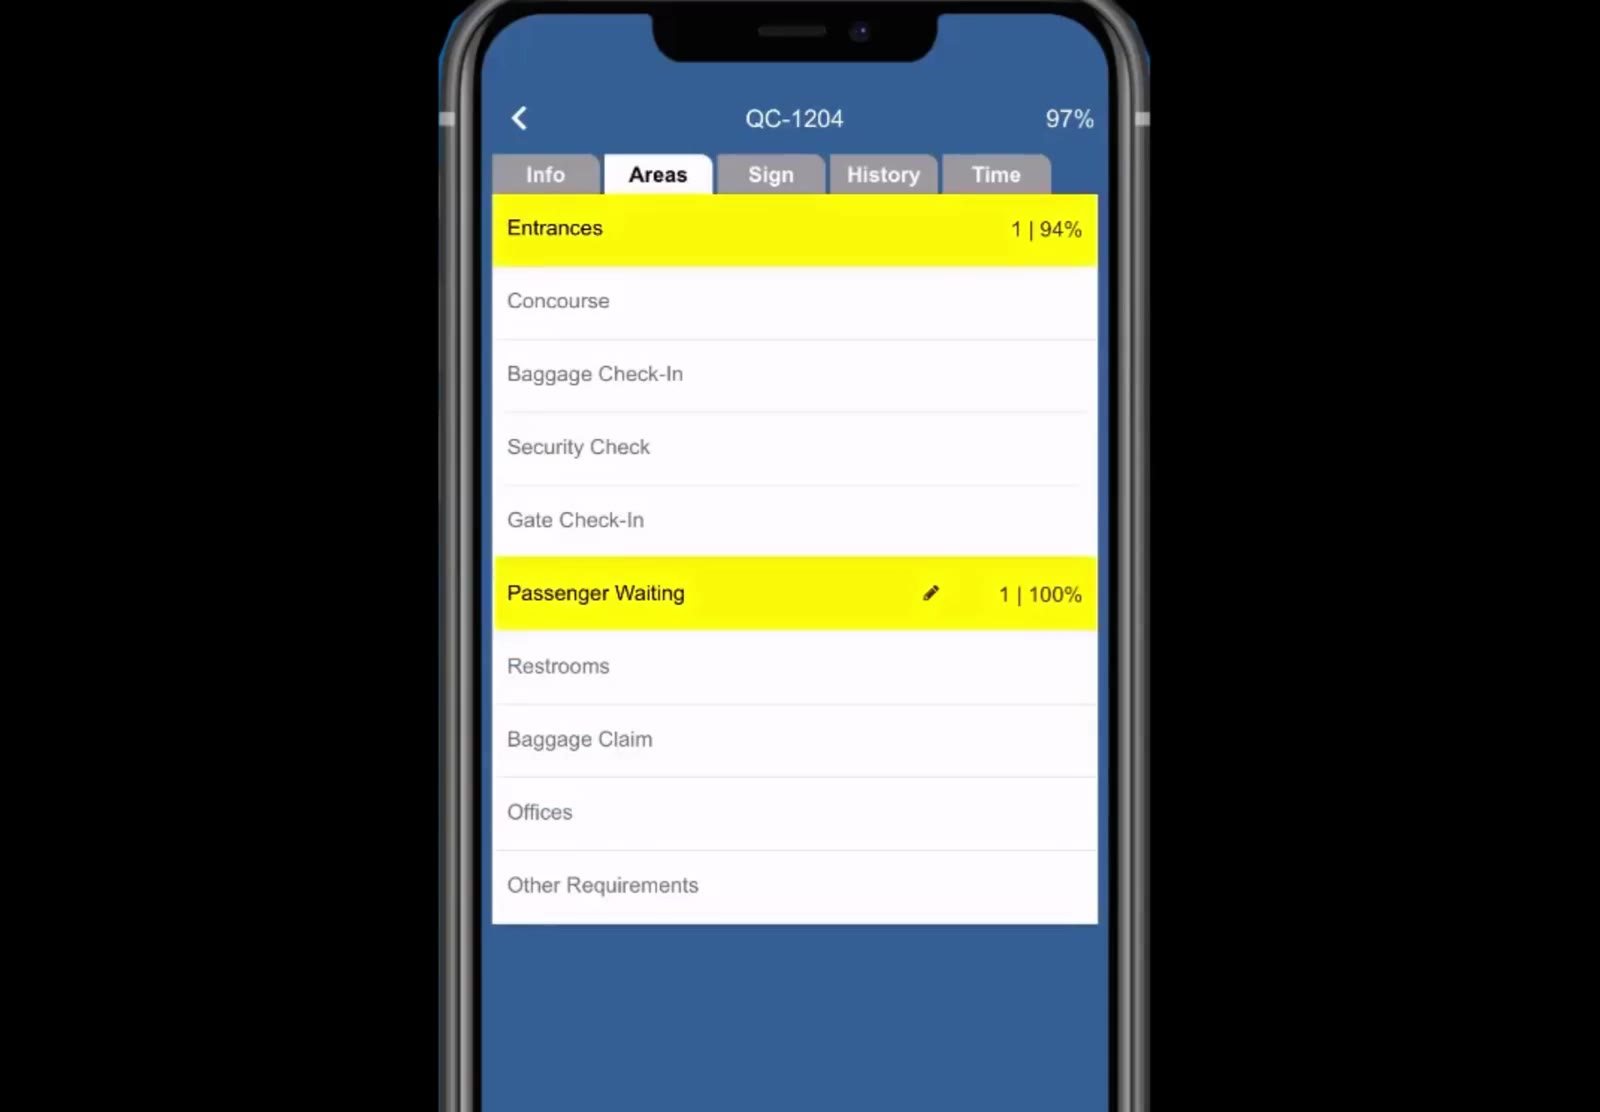
Each area carries its own score, and the figure in the top right is the building’s average so far.
Finish the Inspection
Collect the signatures
Tap the Sign tab and capture signatures from the Inspector, Cleaner or Customer, as your company requires.
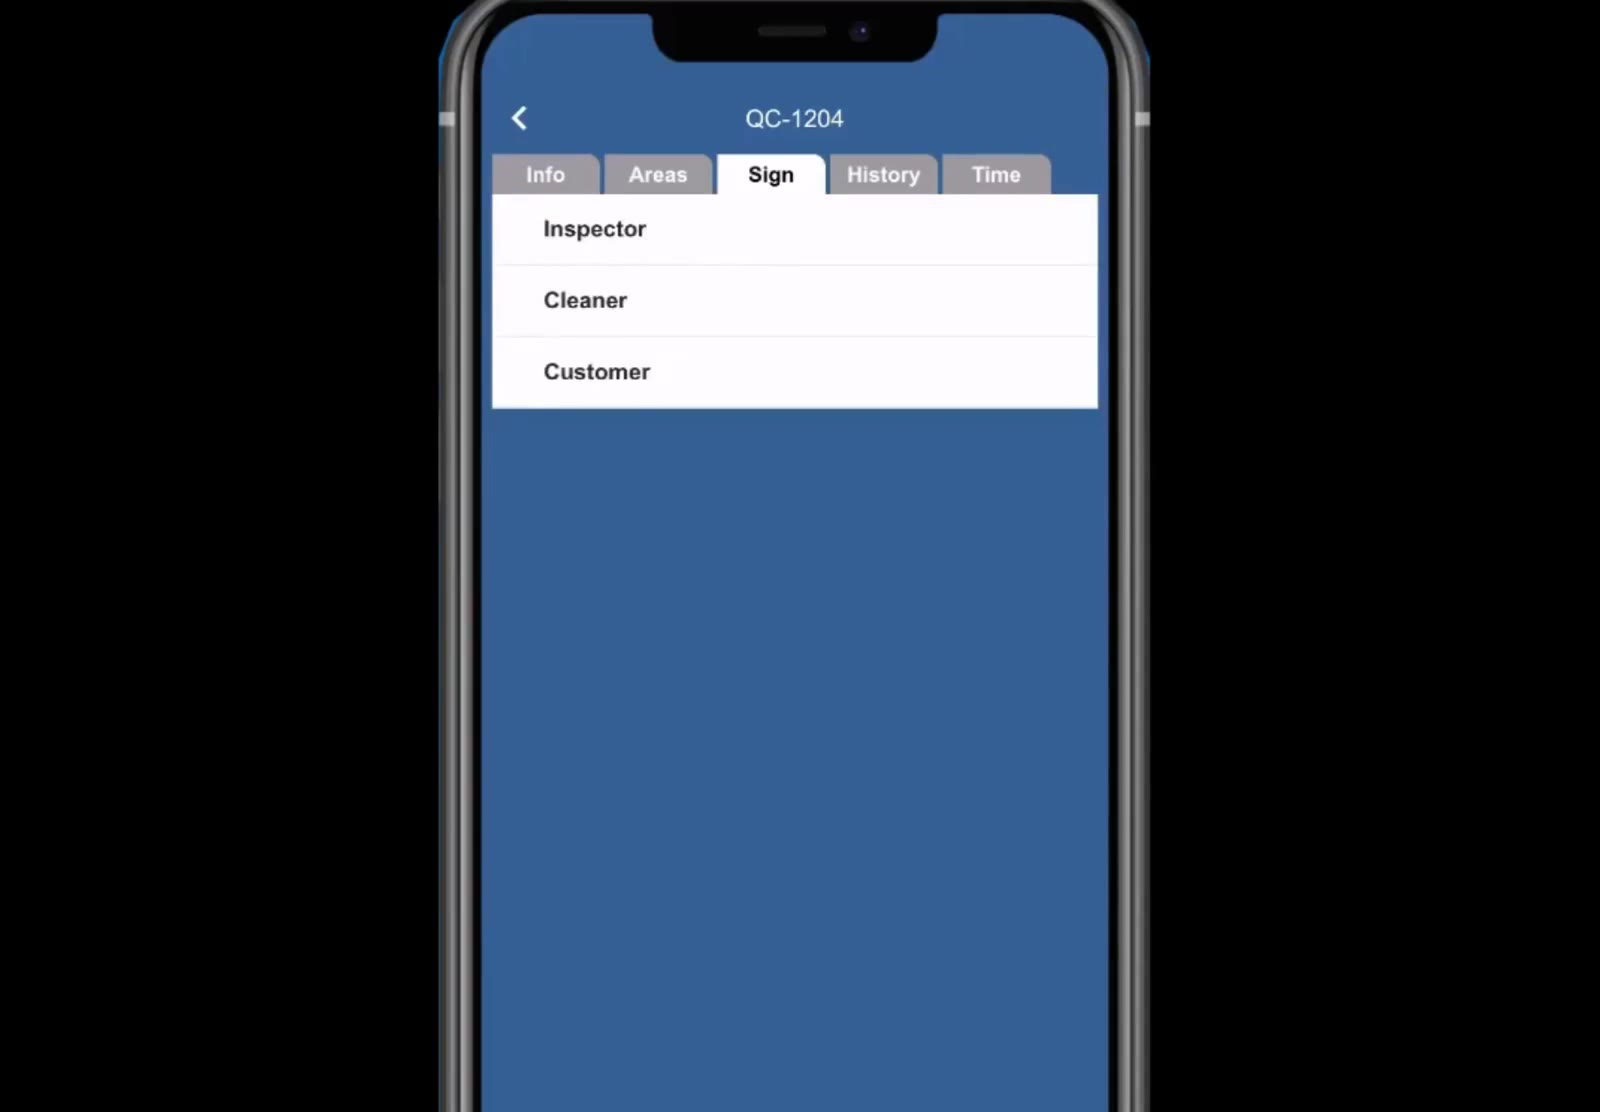
The Sign tab captures signatures from the inspector, cleaner or customer.
Mark it completed
Go back to the Info tab and change Status to Completed. CleanGuru works out the final score.
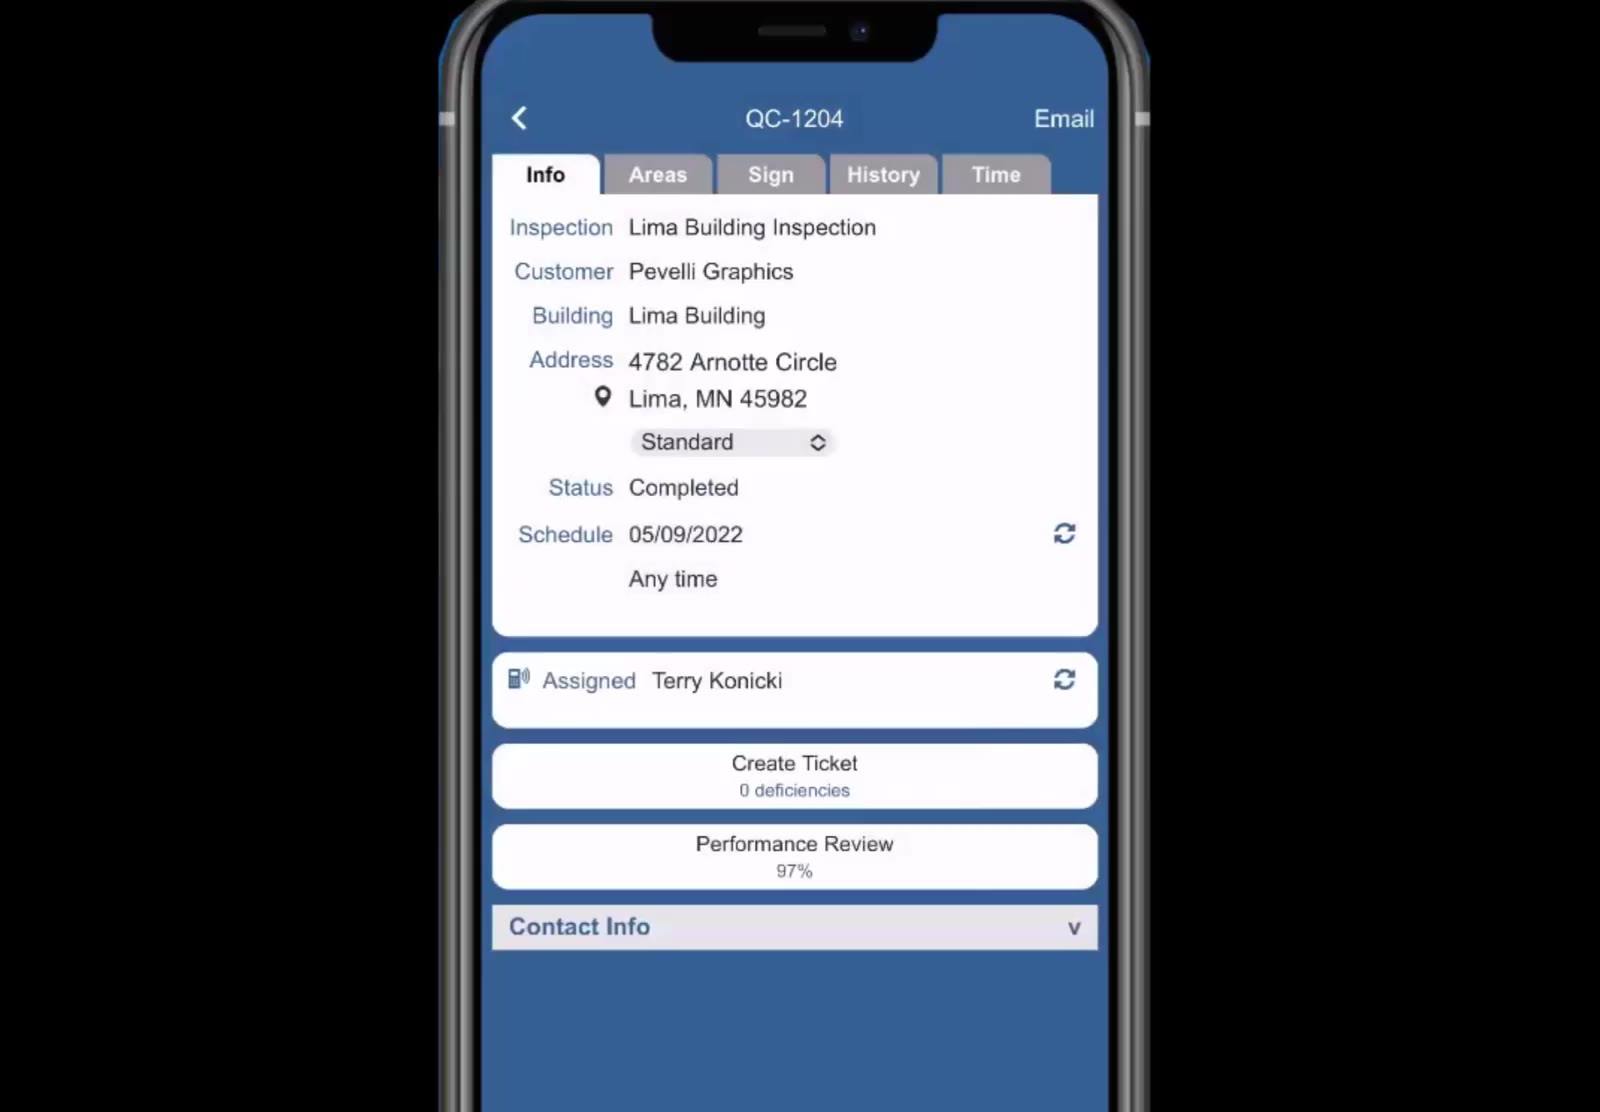
Once the status is Completed, the screen shows the deficiency count and the performance review score.
Send the inspection
Tap Email at the top of the screen to send a PDF copy of the inspection to your customer or your own team.
See the Results
Follow up on the deficiencies
The Create Ticket button shows how many items were rated at a level your rating scale marks as deficient — five, here. Tap it to raise a ticket for them.
Read the performance review
Tap Performance Review for a breakdown of the score by area and a trend line of past inspections for that building.
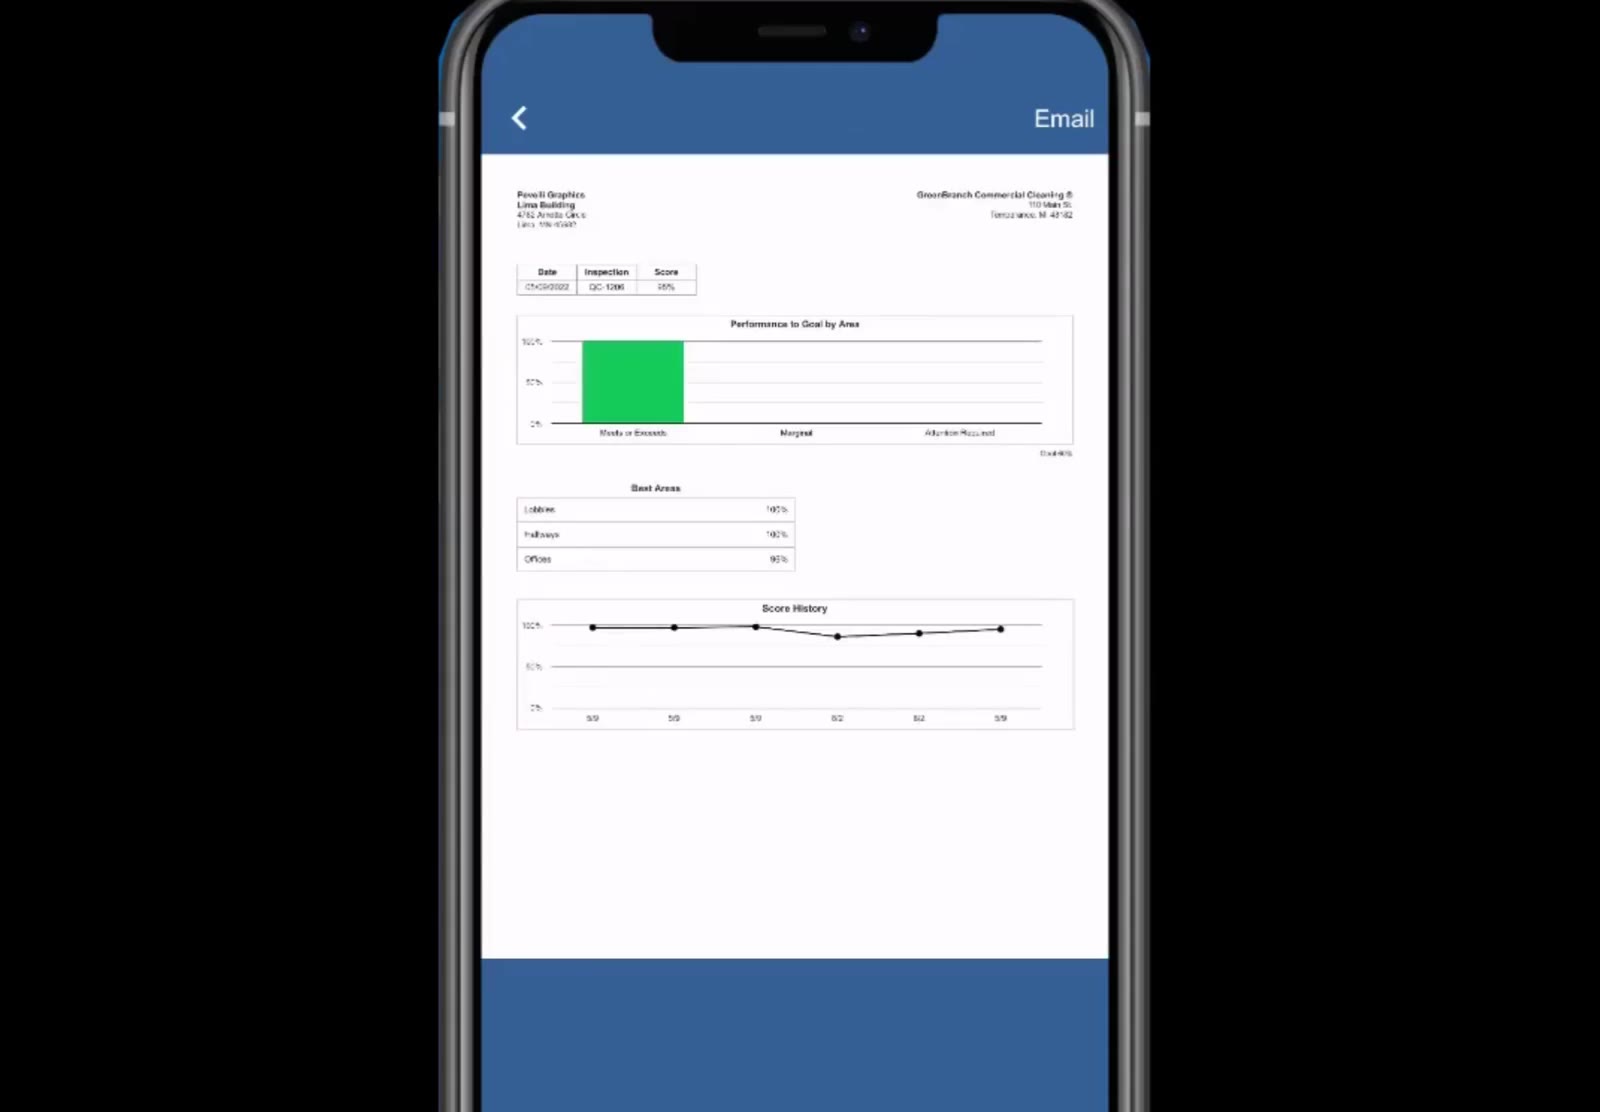
The performance review breaks the score down by area and plots past inspections for the building.
FAQ
Can I add areas to a template after it has been created?
Yes. Open the template and use the Add Area button on the left sidebar.
What happens to the ratings I give an item?
They set the inspection score, and any item rated at a deficient level is what a ticket can be raised from. Which level counts as deficient is set on your rating scale in Settings.
Can my customer see the inspection?
Only if you send it to them. Tap Email on the finished inspection to send them the PDF.