
Create Window Bid
A window bid is priced by the pane, not by the square foot. You count the panes floor by floor, tell CleanGuru how hard they are to reach and what state they are in, and it prices inside-and-out, outside-only and inside-only separately.
Start the Bid
Open the Window bids screen: In the top navigation bar, hover Bids and choose Window.
Start a new bid: Click the green New Bid button at the top left.
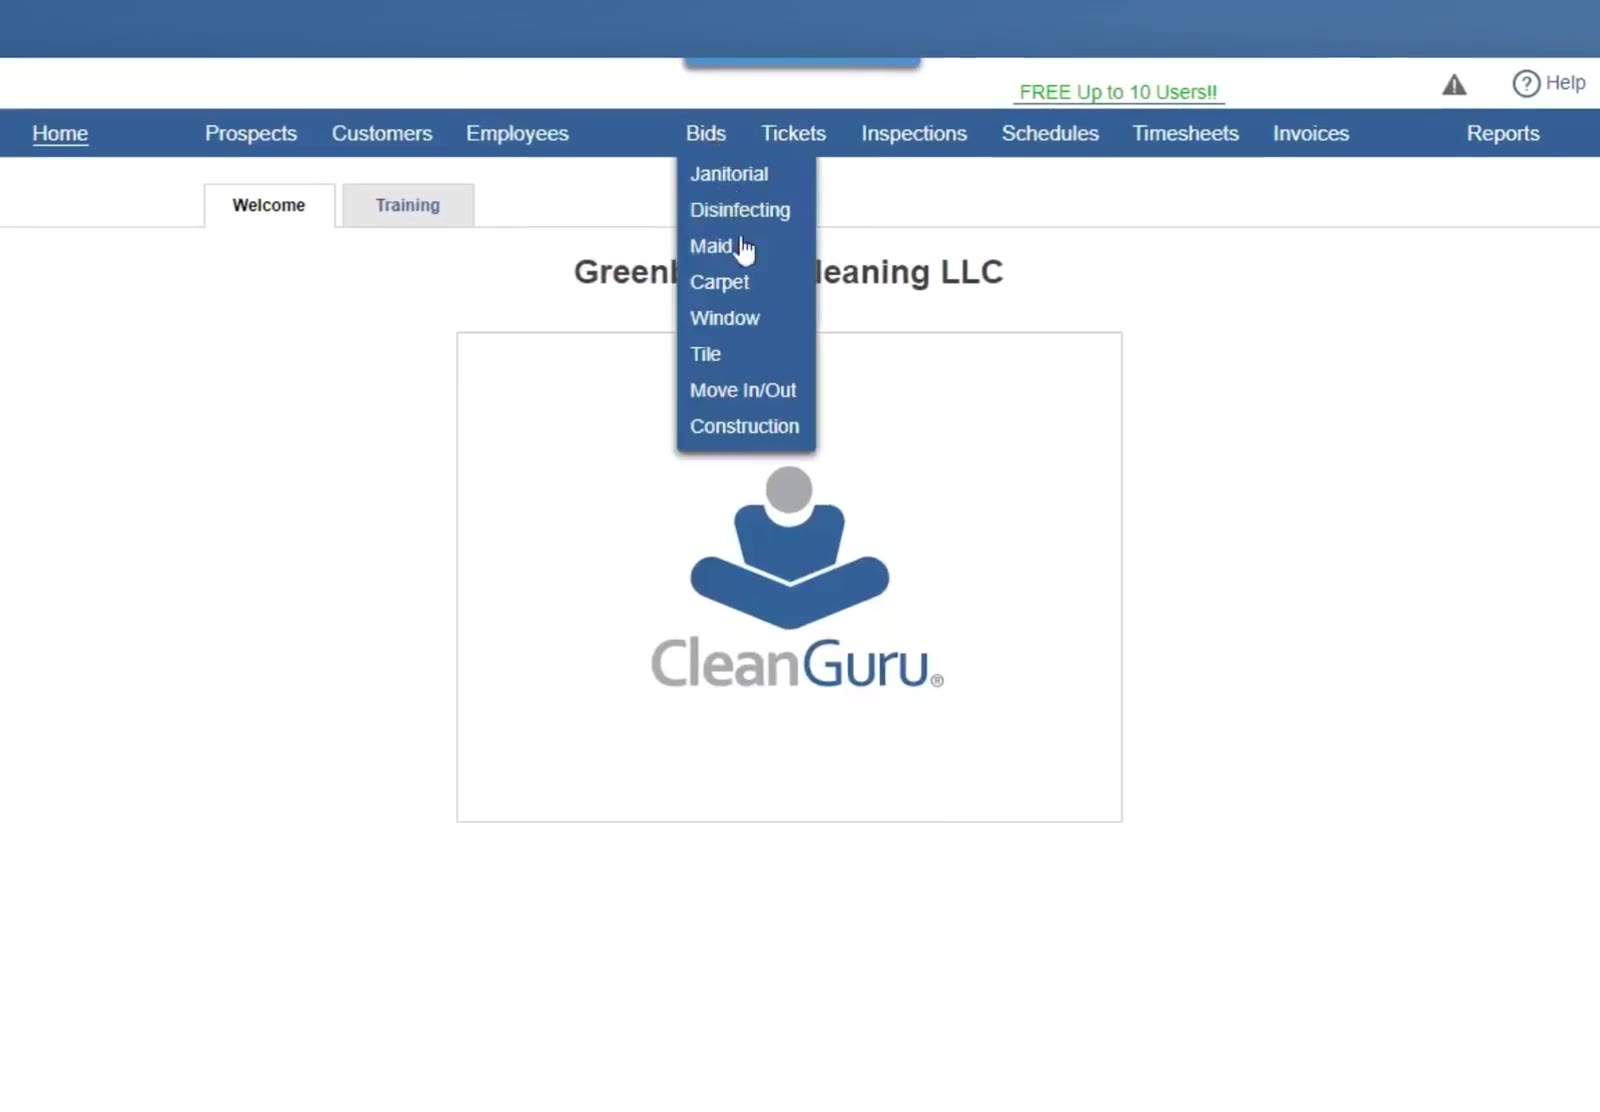
Hover Bids in the top navigation bar and choose Window.
Fill in the bid details: Choose Commercial or Residential, pick Prospect or Customer and select the name, then type a name in the Bid box.
Choose the service and how often: Under Work, tick In & Out, Out Only or In Only — each gets its own frequency dropdown. Under Add'l, tick Screens, Grids or Hard Water Deposits if the job includes them, then click Create.
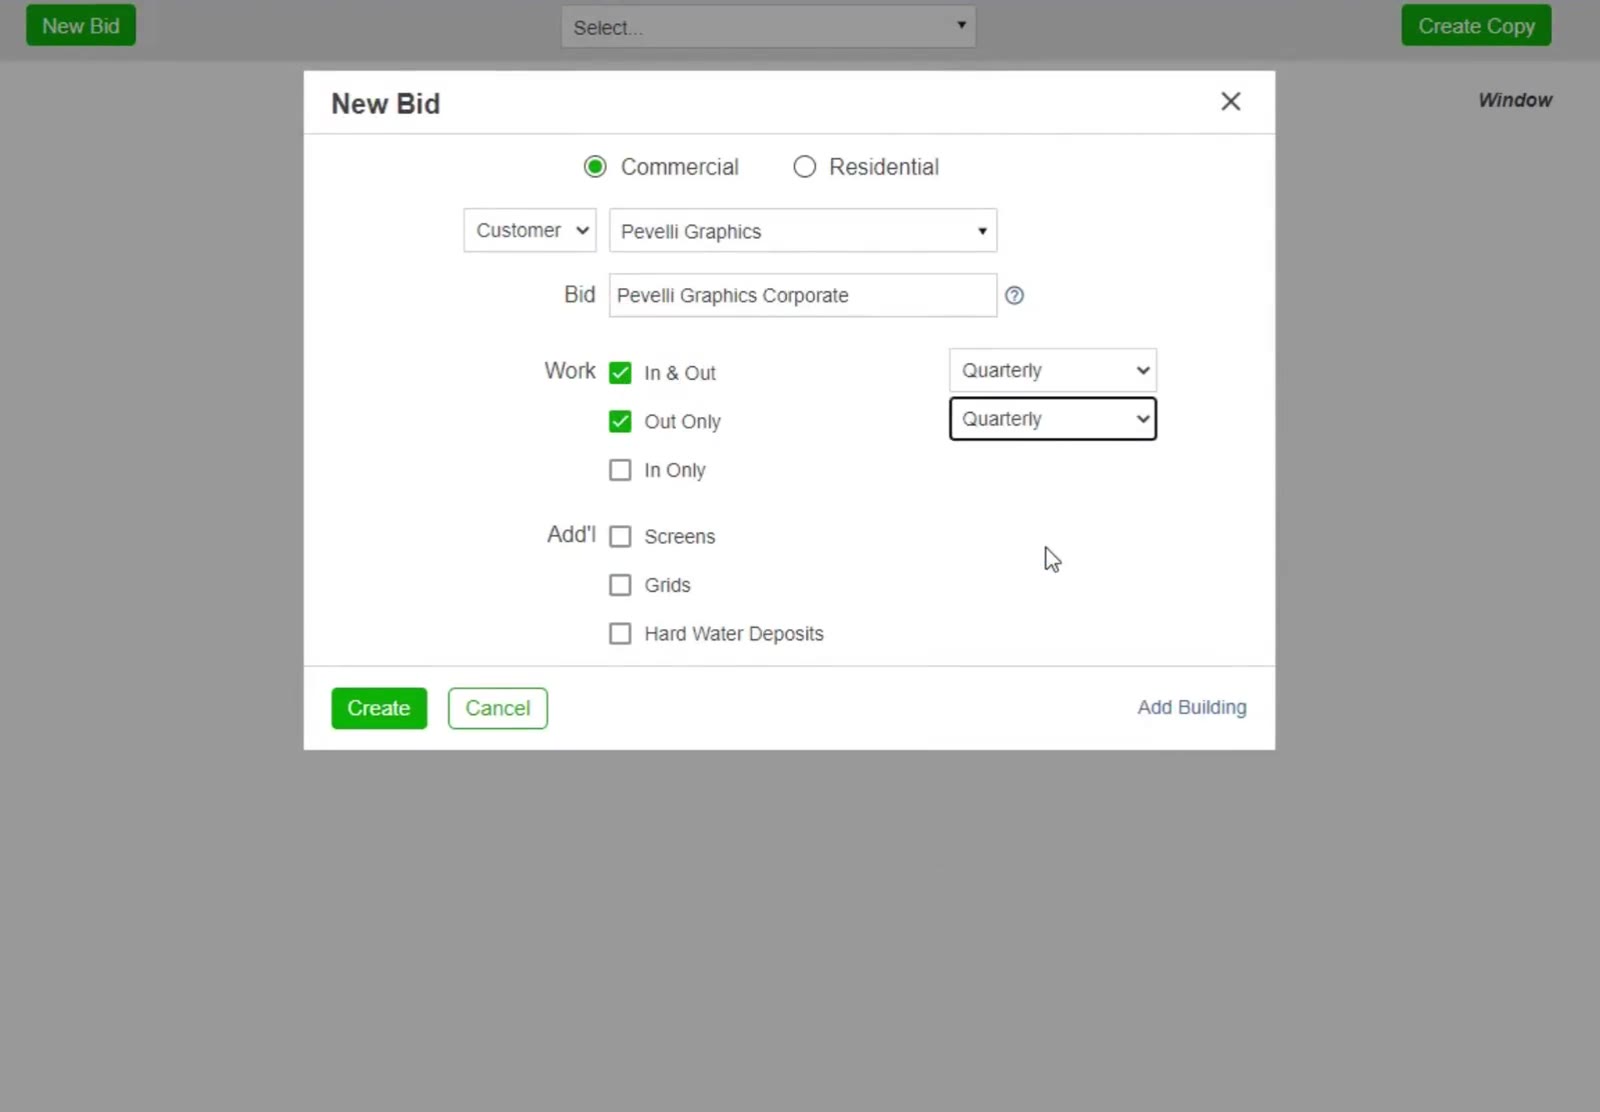
The New Bid dialog: In & Out, Out Only and In Only each take their own frequency, and Screens, Grids and Hard Water Deposits can be added underneath.
Count the Panes
Open the Panes tab: Click Panes. The Enter Pane Counts box appears.
Choose how to enter the counts: Manual adds one line at a time, which is the way this walkthrough goes. Express opens a grid instead — a row for every window type on each floor, with columns for Panes, Screens, Grids and HWD — so you can fill the whole building in at once and click Enter.
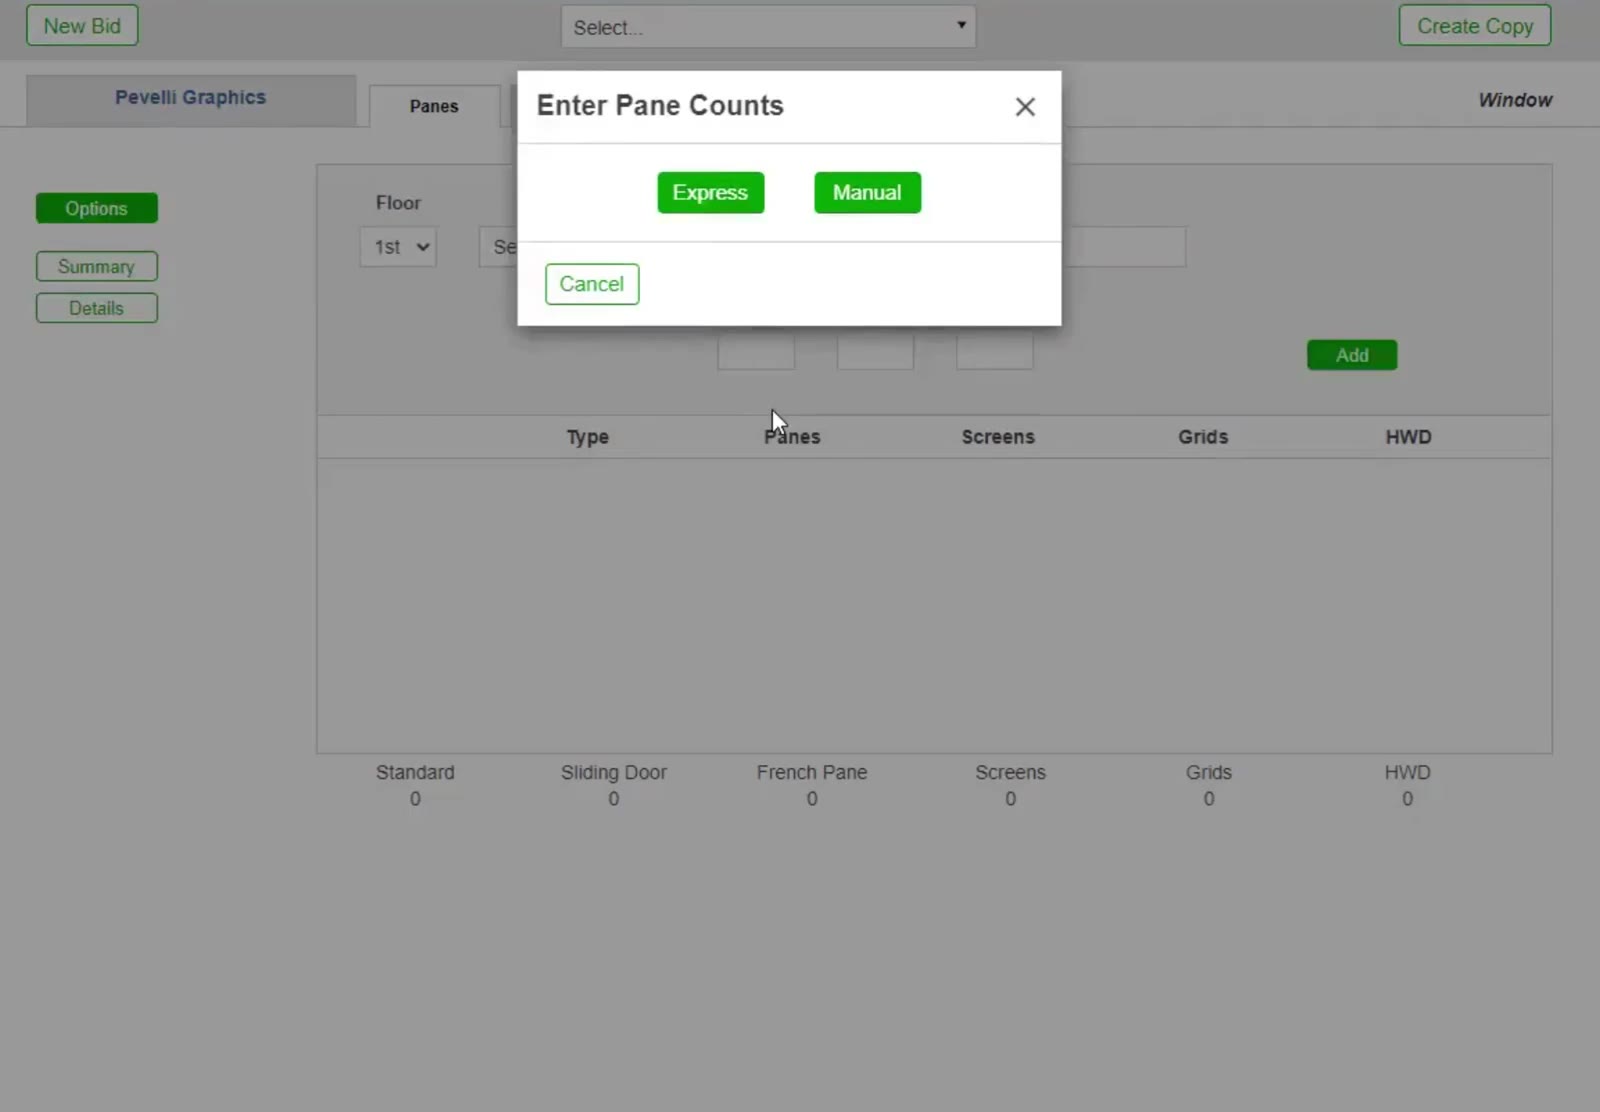
On the Panes tab, Enter Pane Counts offers Express, a grid you fill in for the whole building at once, and Manual, which adds one line at a time.
Enter the counts floor by floor: Pick the Floor, choose the window Type — Standard, Sliding Door or French Pane — and type the number of Panes. Add any Screens, Grids or HWD counts, then click Add. Repeat for every floor.
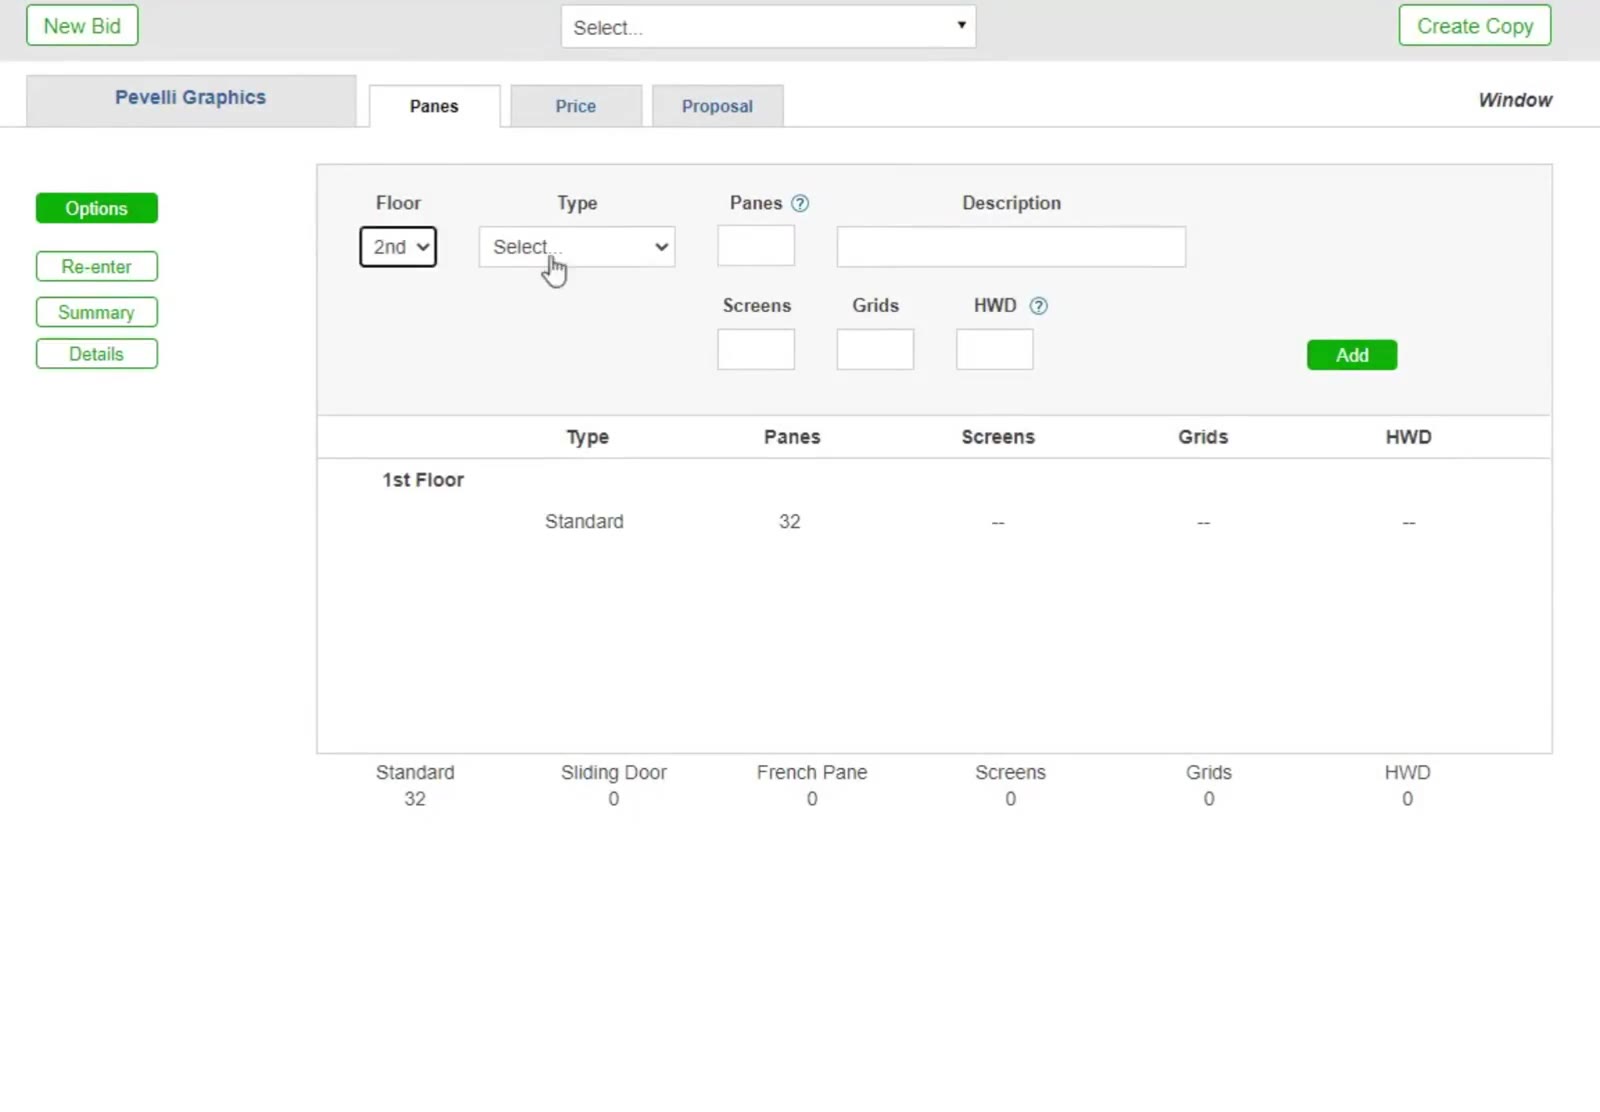
Enter the panes floor by floor: pick the floor and window type, type the count, and click Add.
Check the Work Specifications
Open the specifications: On the Panes tab, click the green Options button at the top of the sidebar.
Adjust the task list: Window Cleaning and Standard Procedures each have their own Add Task button. Click Go Back when you are finished.
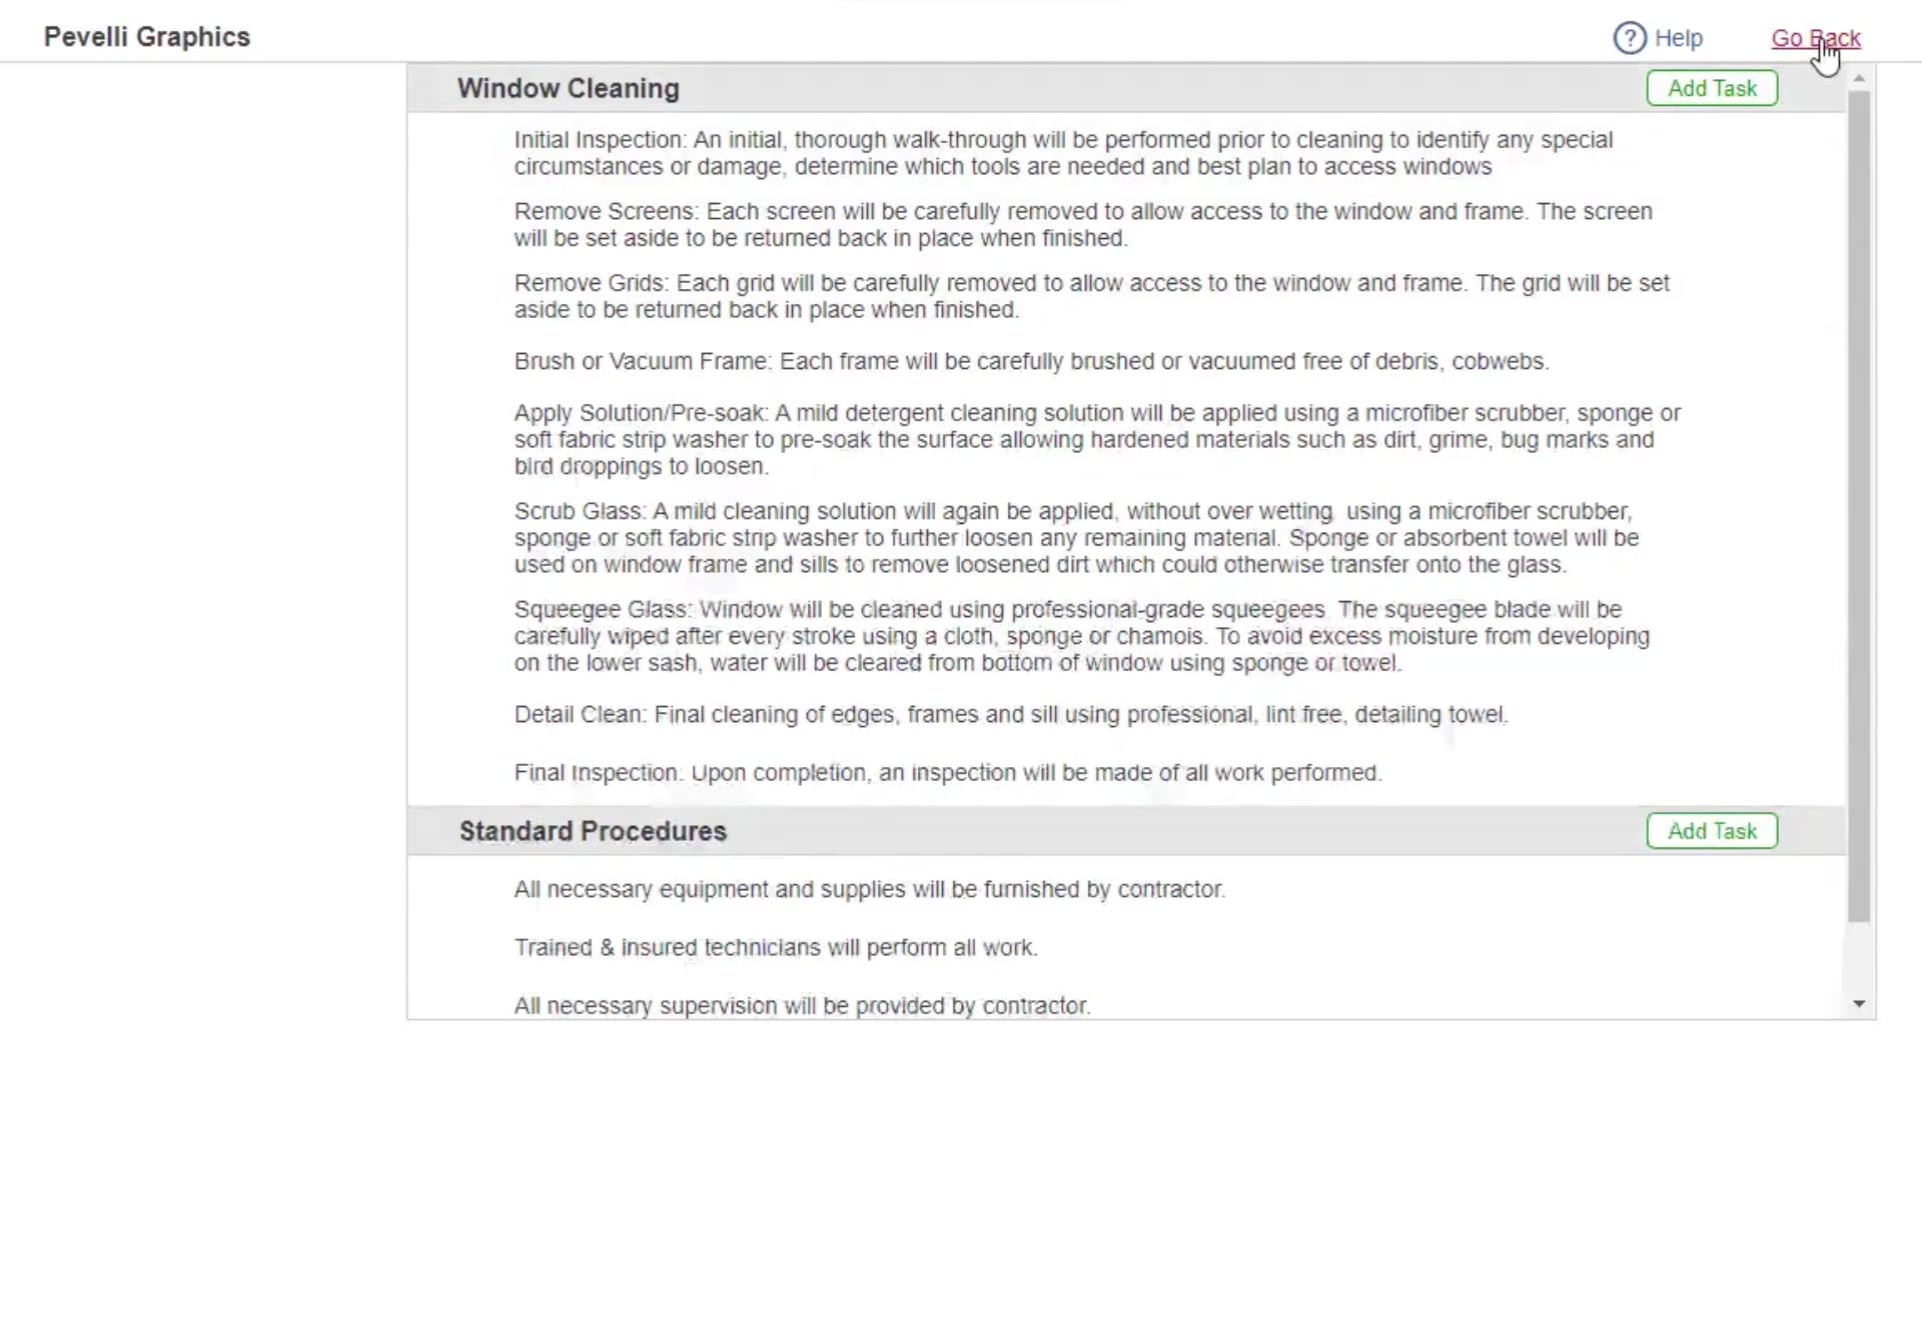
The work specifications. Window Cleaning and Standard Procedures each have their own Add Task button.
Price the Job
Open the Price tab: Click Price. The In & Out, Out Only and In Only radio buttons at the top switch between the services you ticked, and each one is priced floor by floor: Panes, Price/Pane and Price, with Count, Price Each and Price for screens, grids and hard water deposits alongside.
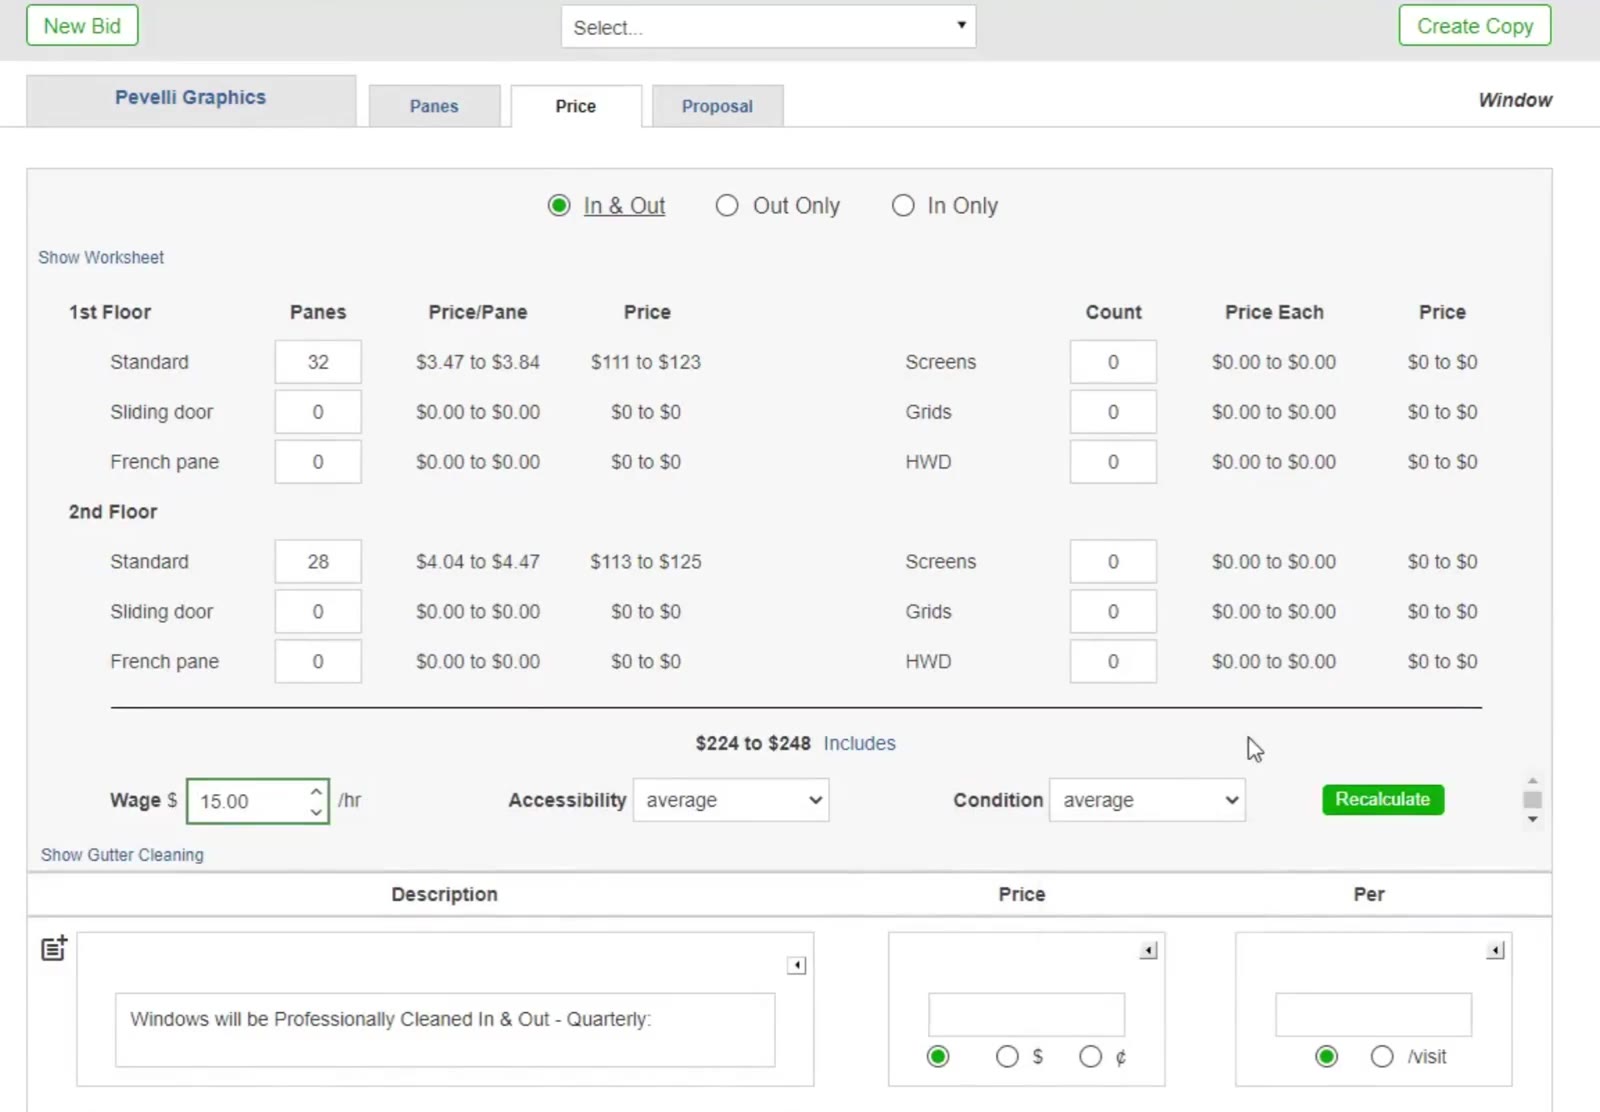
The Price tab prices each service separately, floor by floor, with screens, grids and hard water deposits counted alongside.
Set the pricing factors: In the footer, enter your hourly rate in Wage $ and set Accessibility — how easy the windows are to reach — and Condition. Click Recalculate to see the new range.
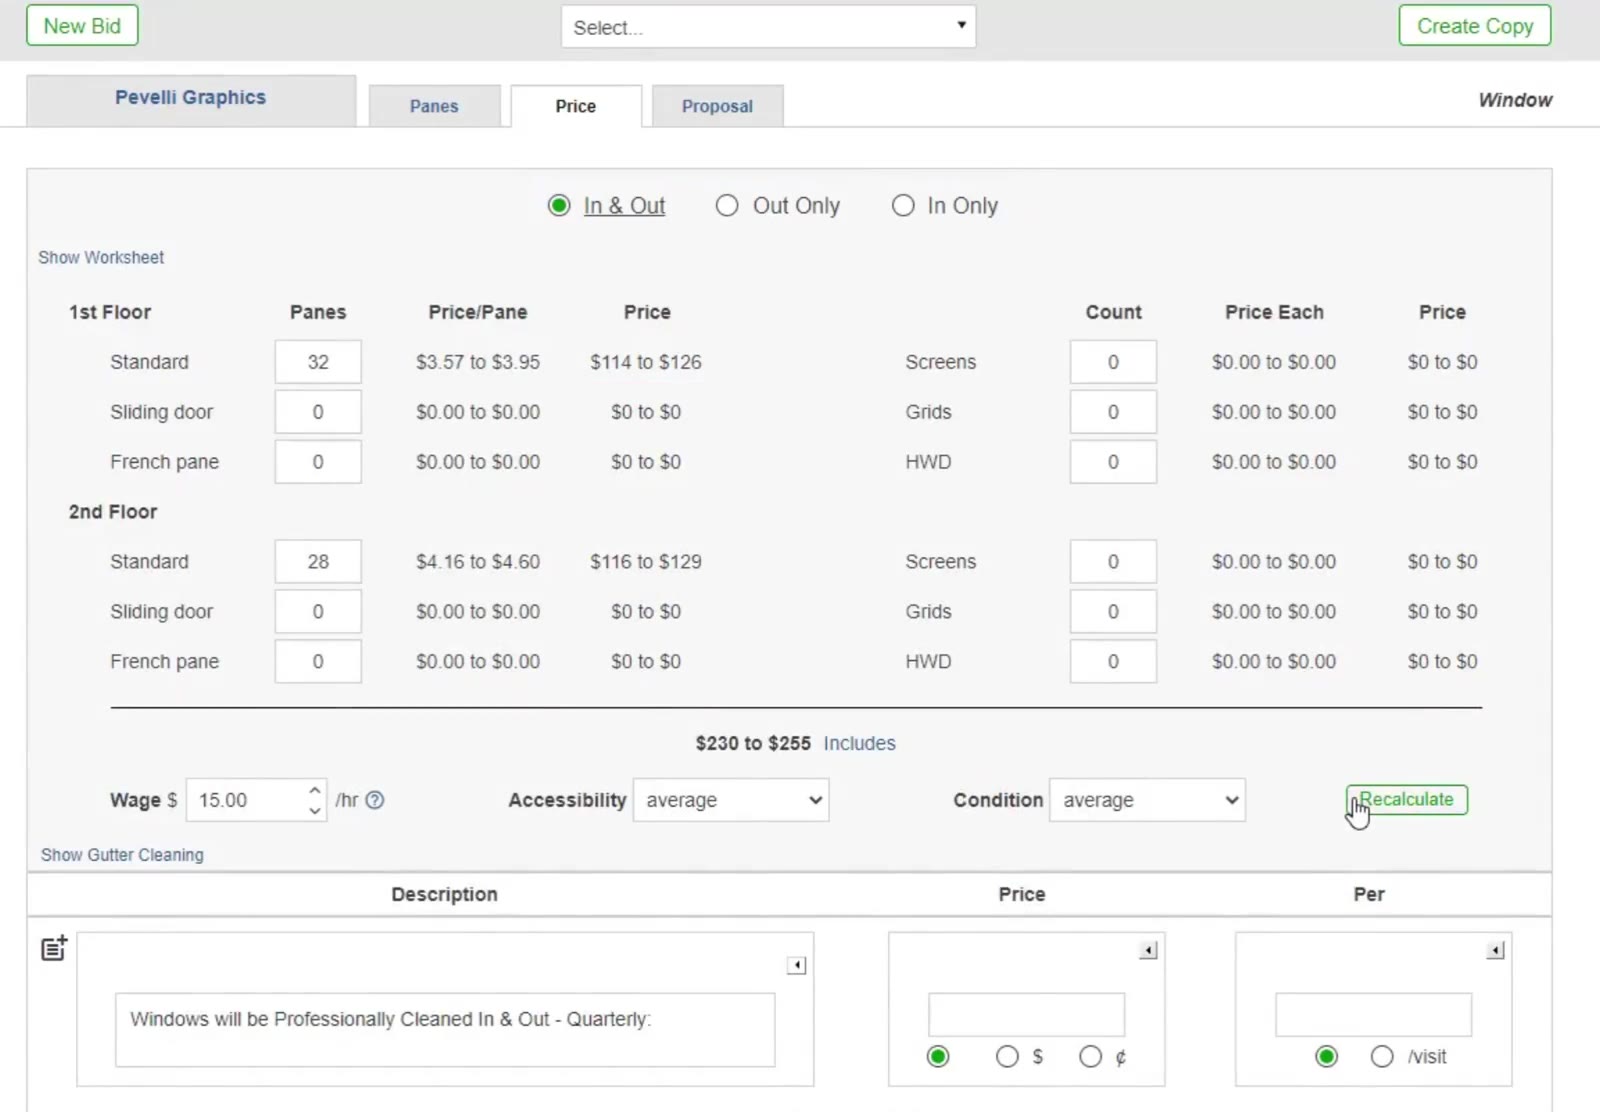
Wage, accessibility and condition drive the recommended range; Recalculate updates it.
Enter your price: In the Description and Price table underneath, CleanGuru has already written a description for each service you ticked. Type your figure for each one, choose $ or ¢ and /visit, then click Save. To reword a line, click the icon to its left to pick a standard description, or type your own.
Build the Proposal
Choose what the proposal contains: Click Proposal, then tick what to include — Proposal, Window Details and Work Specifications.
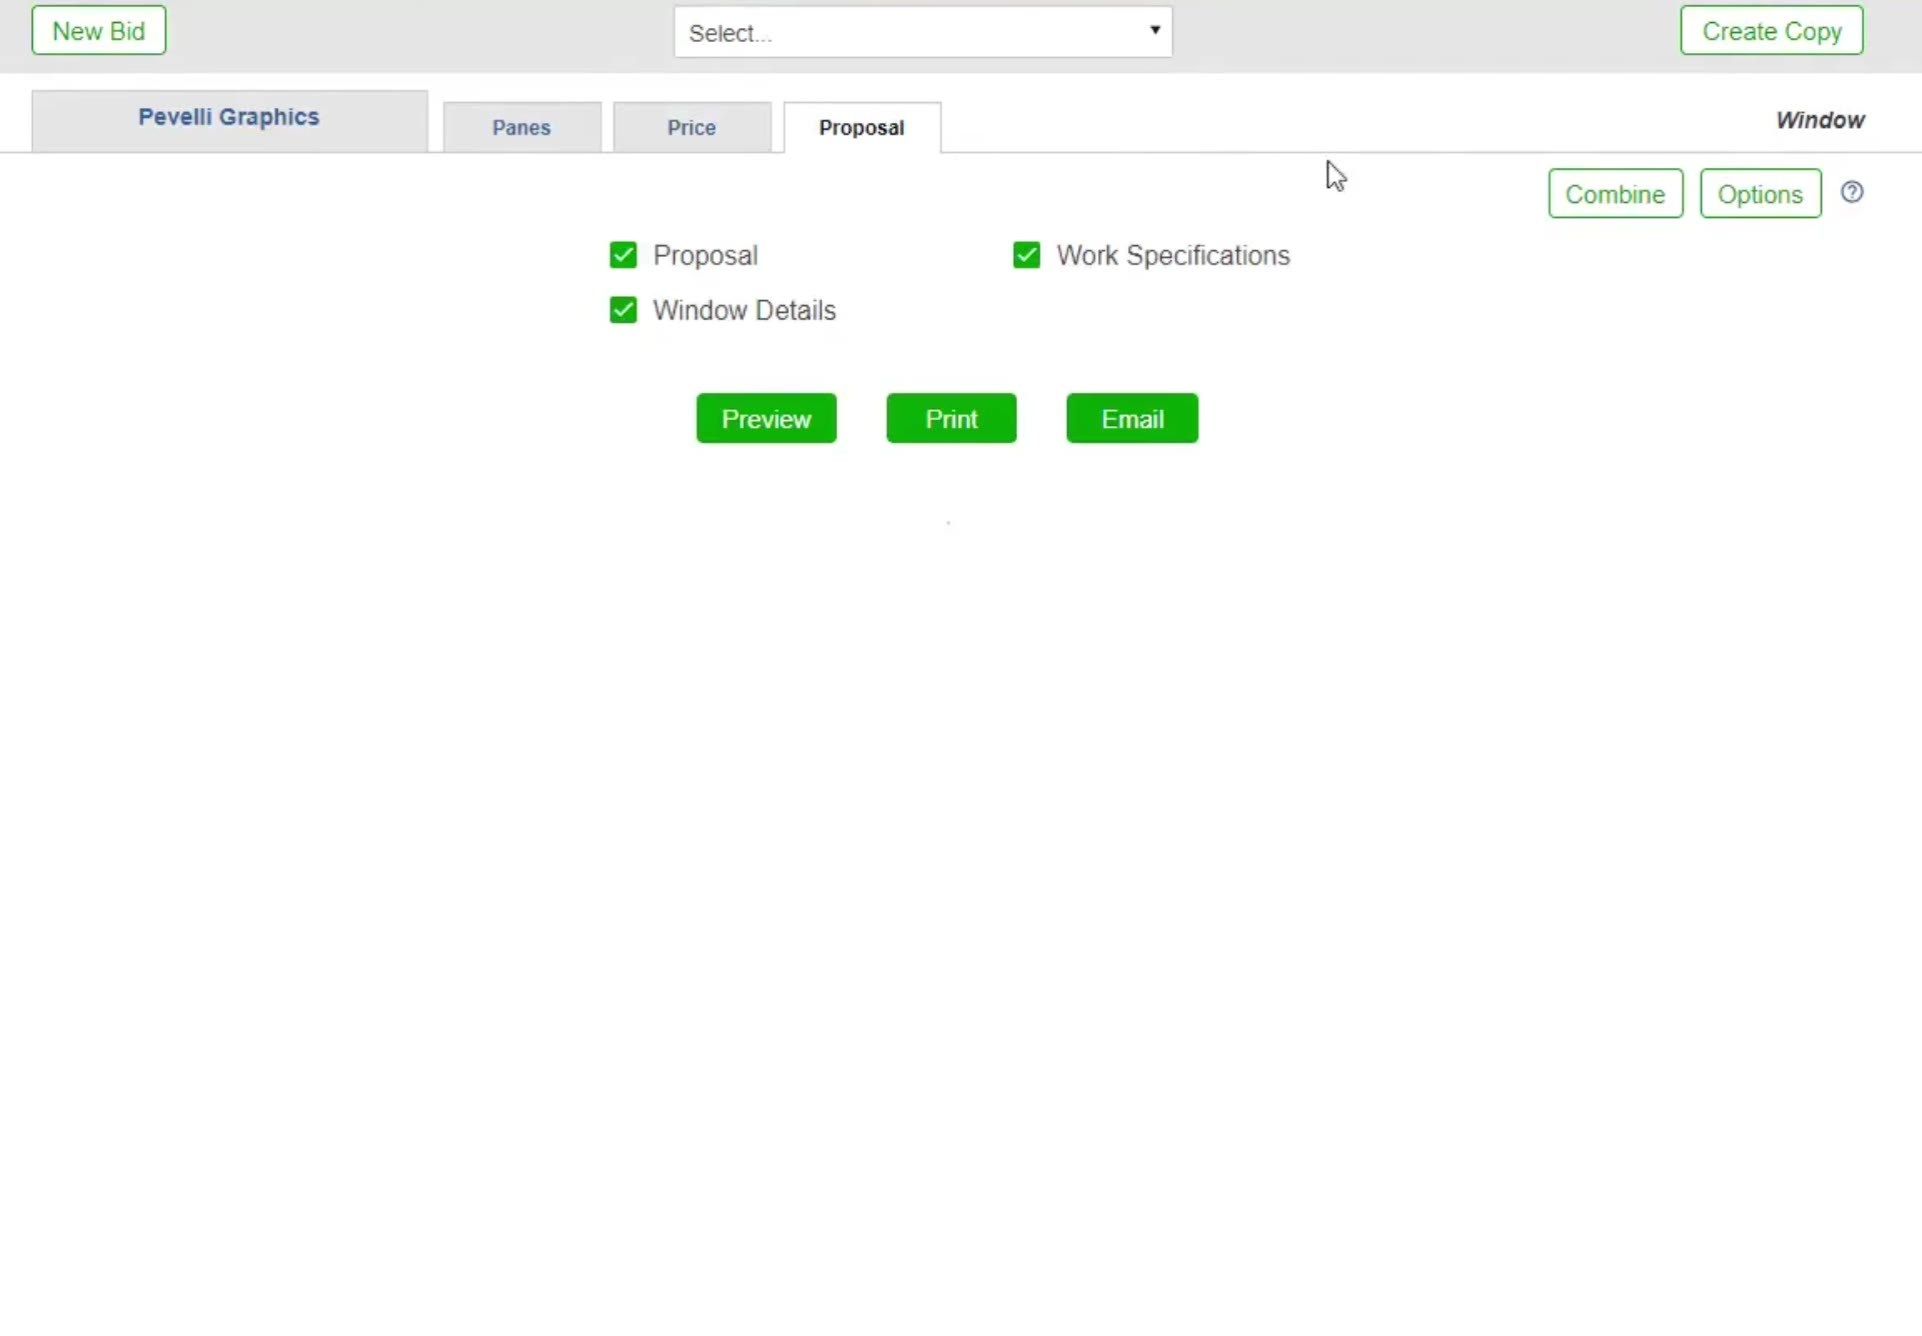
The Proposal tab for a window bid: Proposal, Window Details and Work Specifications, with Combine and Options at the top right.
Open the section options: Click Options at the top right of the Proposal tab.
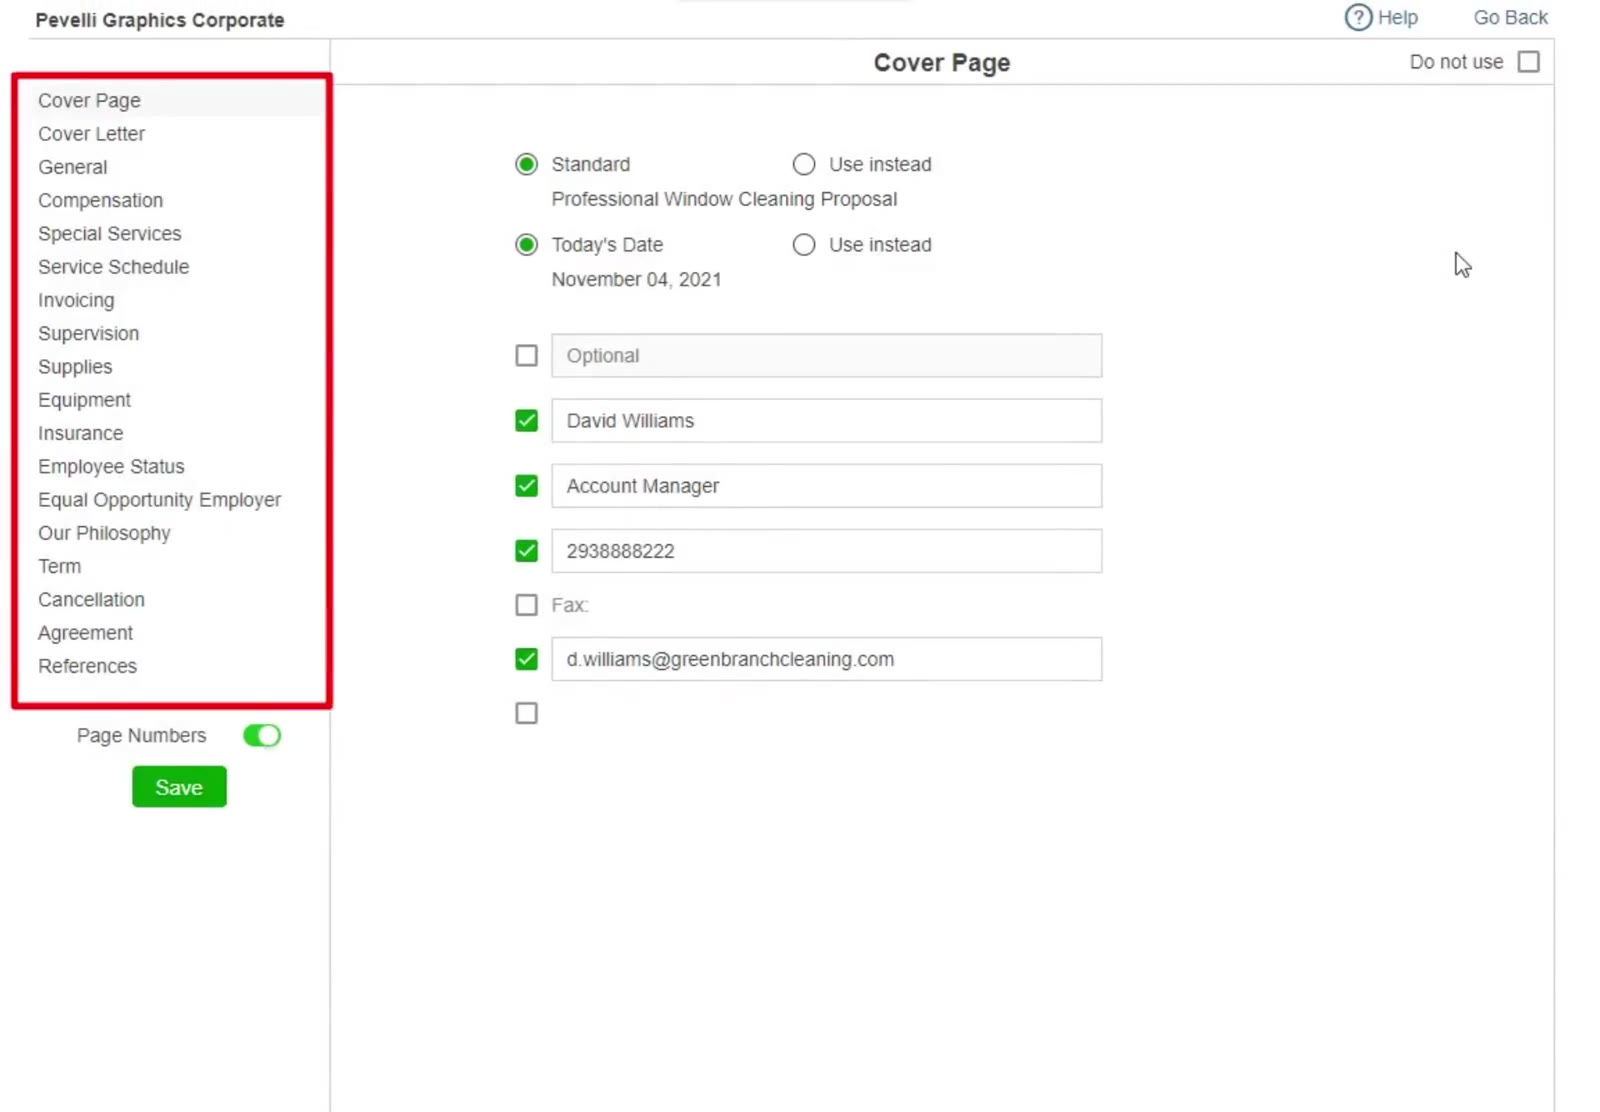
The proposal Options screen: the section list on the left, the selected section’s wording on the right, Do not use at its top right, and the Page Numbers toggle above Save.
Reword or drop a section: Pick a section in the list on the left — Cover Page, Cover Letter, General, Compensation through to References — to change its wording, or tick Do not use to leave it out of this proposal. Page Numbers switches page numbering on and off. Click the green Save, then Go Back to return to the Proposal tab.
Preview it: Click the green Preview button at the bottom of the Proposal tab.
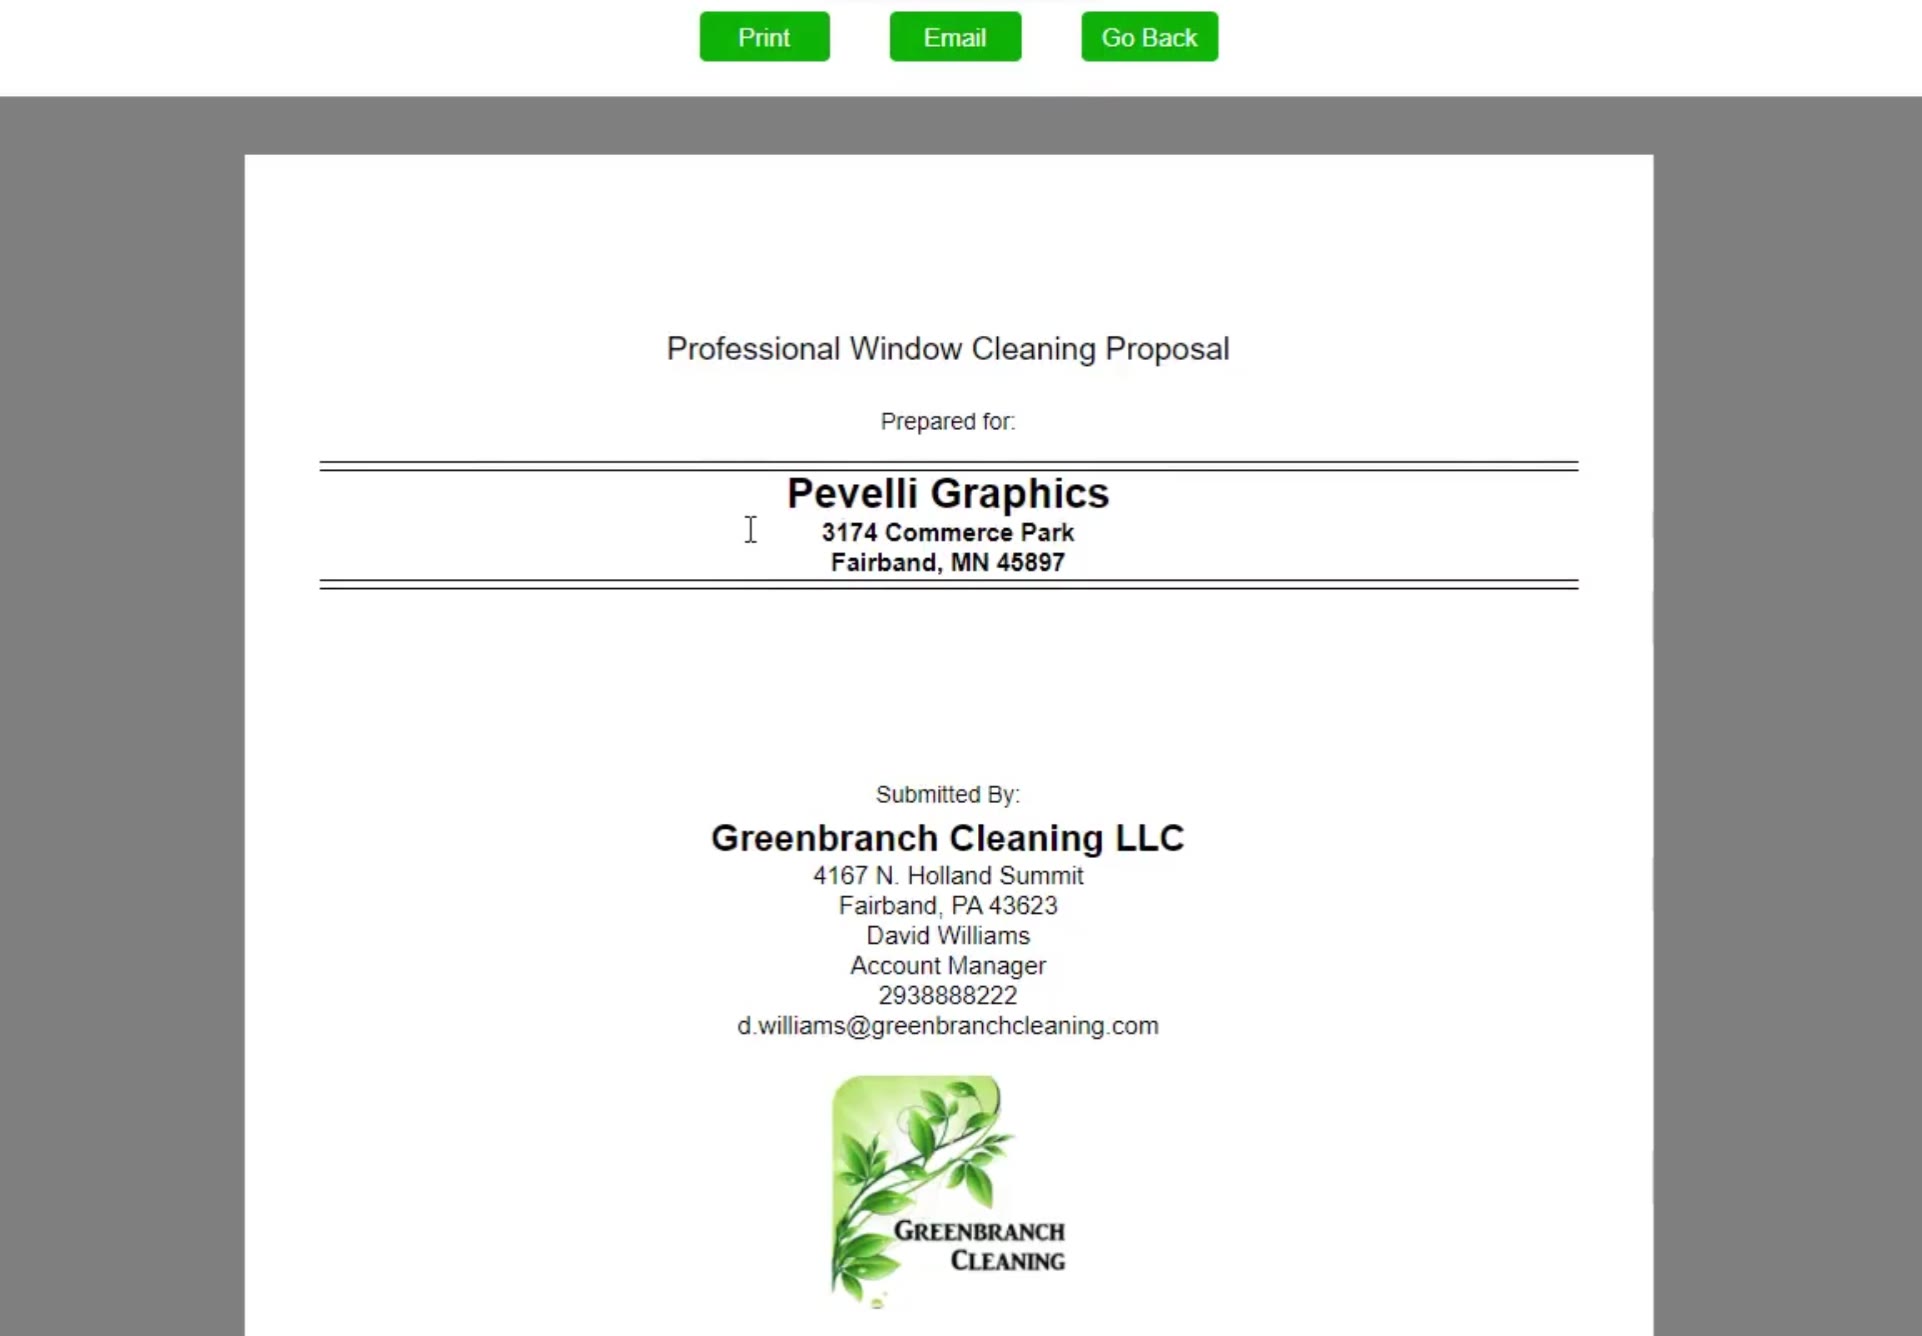
The proposal opens on its cover page, carrying your company details and logo.
Check the pages: Page through the proposal. The work specifications spell out every step of the clean, from the initial inspection to the final detail.
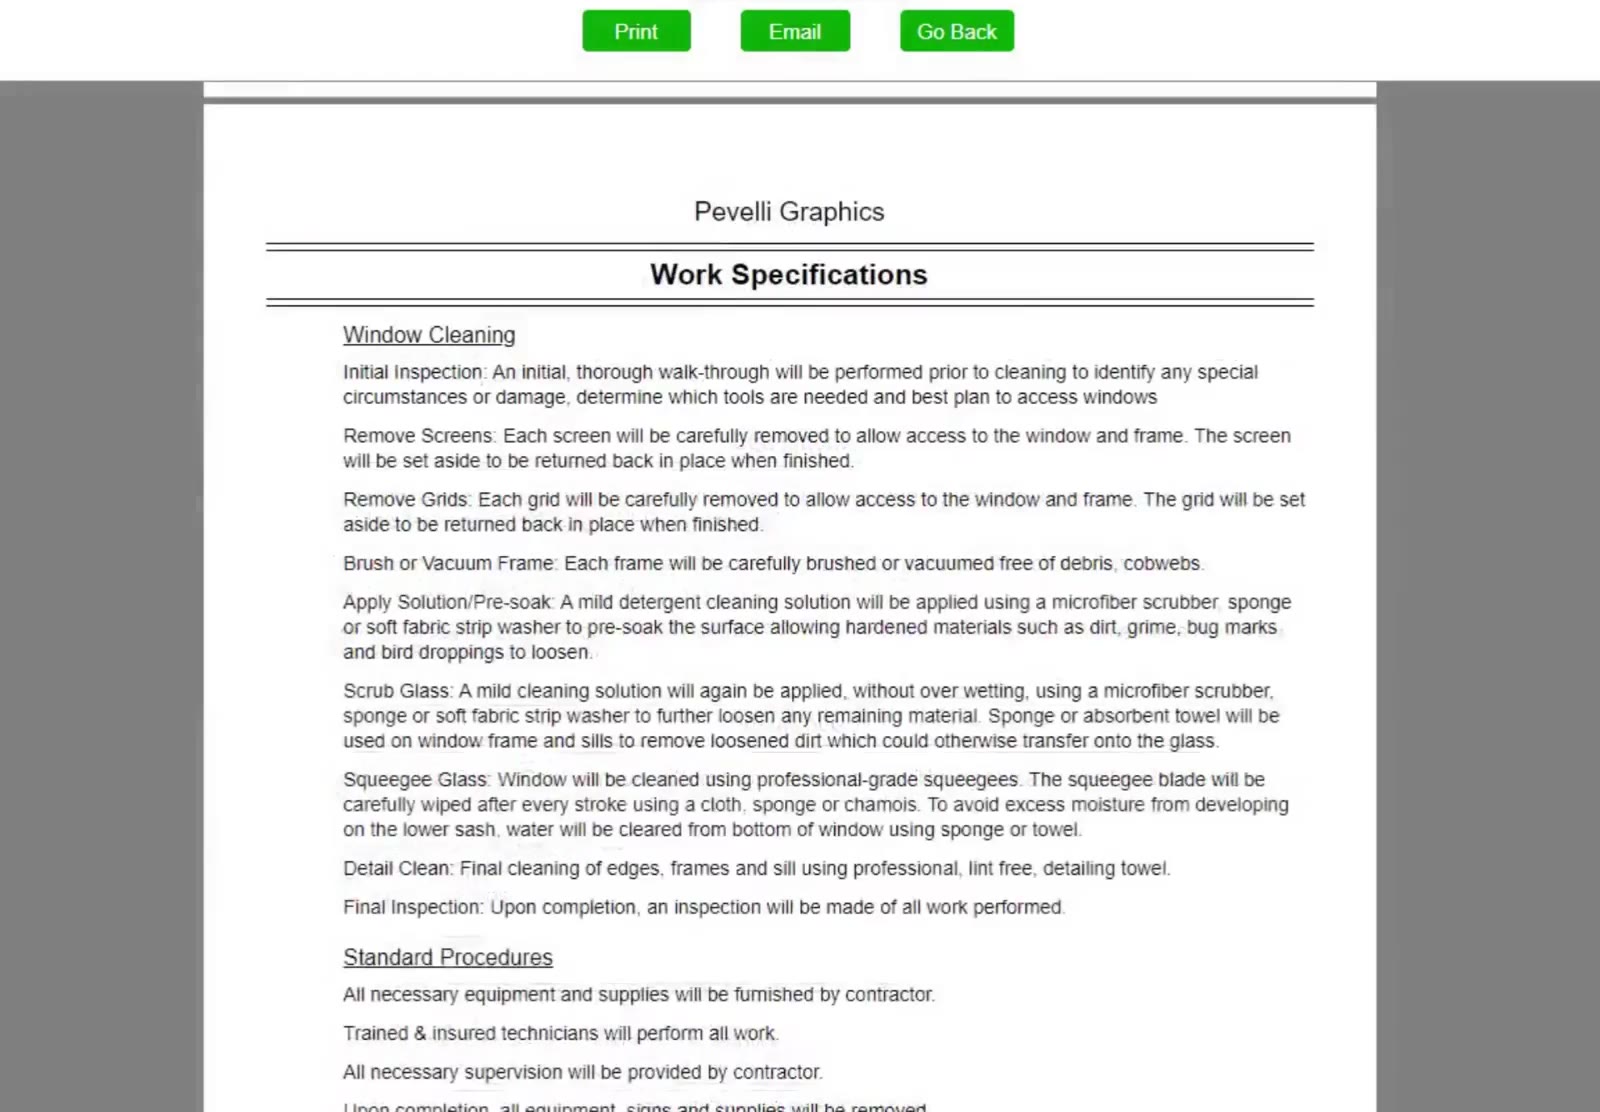
The work specifications go into the proposal in full, so the customer sees exactly how the windows will be cleaned.
Send it: Click Print or Email at the top, or Go Back to keep editing.
That is a complete window bid: counted, specified, priced for each service and packaged as a proposal you can send. Because CleanGuru prices In & Out, Out Only and In Only side by side, you can offer the customer a choice from the same bid.
FAQ
Why does the Price tab have three radio buttons?
Because a window costs a different amount depending on whether you clean both sides, the outside only or the inside only. CleanGuru prices each service you ticked, and the radio buttons switch between them.
What do Accessibility and Condition change?
Accessibility is how hard the windows are to reach — ladders, poles or lifts take longer than ground-floor glass. Condition is how dirty they are. Raising either raises the recommended price.
What are Screens, Grids and HWD?
Extras counted separately from the panes: screens to remove and replace, grids to take out, and hard water deposits to treat. Each has its own count and price on the Price tab.
Can I quote more than one frequency?
Yes. Each service you tick in the New Bid dialog takes its own frequency, so you can quote quarterly inside-and-out alongside monthly outside-only.
Do window bids include marketing highlights?
No. System Highlights and Service Highlights belong to the janitorial module only.
Can I change the wording of a price description?
Yes. CleanGuru fills each line in from the service you selected. Click the icon to the left of a description to choose from its standard descriptions, or click into the box and type your own.